

During my time “in bands” – I usually played bass. Strange then, that most of my project build and restoration projects thus far, have mainly been either guitars or drums. Recently however – I’ve had an urge to get the old bass out again and that seemed to plant the idea for a couple of potential new projects. In my gigging days – I usually favoured a Fender Precision or an “upgraded” G&L version, (a “Legacy” LB-100) – but, what with my growing appreciation of the Fender offset form – I can’t think why I’ve never really tried out a Jazz Bass. I know the pickups are supposed to be slightly “toppier”, (and typical “signature” Jazz players aren’t necessarily what I’d look at for stylistic inspiration) – but a combination, with the usual split Precision pickups at the “neck position” and a Jazz “bridge” pup – as on the P/J hybrid – might be interesting thing to look at, at least as a starter. Maybe a 60’s/70’s style Jazz Bass, (to scratch that offset itch), while I get to grips with a more 70’s styled P/J?… There’s two different potential projects right away…
As with most of my builds – I’ll proceed with a mixture of new Fender parts, reclaimed, reconditioned original parts and quality substitutes. If things work out – I can always further upgrade from there, as appropriate. This general strategy not only provides a chance to slightly reduce overall outlay, to begin with – it also potentially opens up a few extra levels of involvement, and quite a few new tasks and processes, for me to try and get my head around. For this first Jazz Bass – I’ll start with a new, black, stock Fender body. (It’s not the best time of the year to spray nitro…) However – given my preference for rosewood fingerboards, (and since Fender insist on sticking with Pau Ferro, as a substitute for rosewood, on their standard lines) – I’ll try and refresh and repair an old Mexican Fender neck, dating from before the switch. That will hopefully give me the basic form I desire, onto which I can install the hardware of my choice – and I’ll take it from there.
(On a slightly different tack – I also have a long standing desire to revisit a fretless bass at some point. This may, (or may not), prove to be a suitable opportunity – but I’m also currently looking out for a rosewood fretless neck which I’d ideally be able to “swap out” with the restored Jazz neck, as a future experiment. When I first started playing wth the Citizens – back in 1996 – I borrowed the previous incumbent’s fretless Precision Bass, while I found my way into the new role. (I hadn’t played much, for a period before that – due to moving around, and a couple of other, enforced, “life changes”). I was quite disappointed to have to eventually hand the thing back to it’s true owner – but when I went out to buy a replacement for myself – I ended up going for a fretted Precision. I don’t know why I didn’t look out for another fretless at the time… (I suppose it simply boils down to the fact that you don’t see many of them around, and sometimes “standard” is a bit easier to fit into the usual band “template”). Anyway – while I’m working on a restored neck for the new Jazz bass – it might be interesting to look at that fretless option too…)
So – another new project… My first efforts will concentrate around a used neck which I’ve managed to obtain for a decent price, given the “little attention” it needs. With second-hand necks, (especially if bought, without close examination, on the usual online auction sites), there’s always a risk that the thing might be somehow damaged beyond repair, or that the required repairs might get too involved – but since the only other realistic alternatives are either a new Pau Ferro boarded neck, or a new Fender licensed neck, (which would usually need finishing from scratch completely) – this sort of restoration job, (and I stress – if bought for the right price) can often work out to be a much more interesting and rewarding route. Sometimes a seller might allow returns – so the risk of getting stuck with a dud is somewhat reduced. Ultimately however – it helps to have a, “if it’s not right – I’ll fix it” sort of attitude, and a willingness to experiment and learn.
With a likely candidate eventually obtained for approximately 30% of the price of a brand new Fender Mexican neck – and with it’s few areas of deficiency honestly “fessed up” in the online listing – let’s take a look, and see what needs doing, to get things back into fettle…

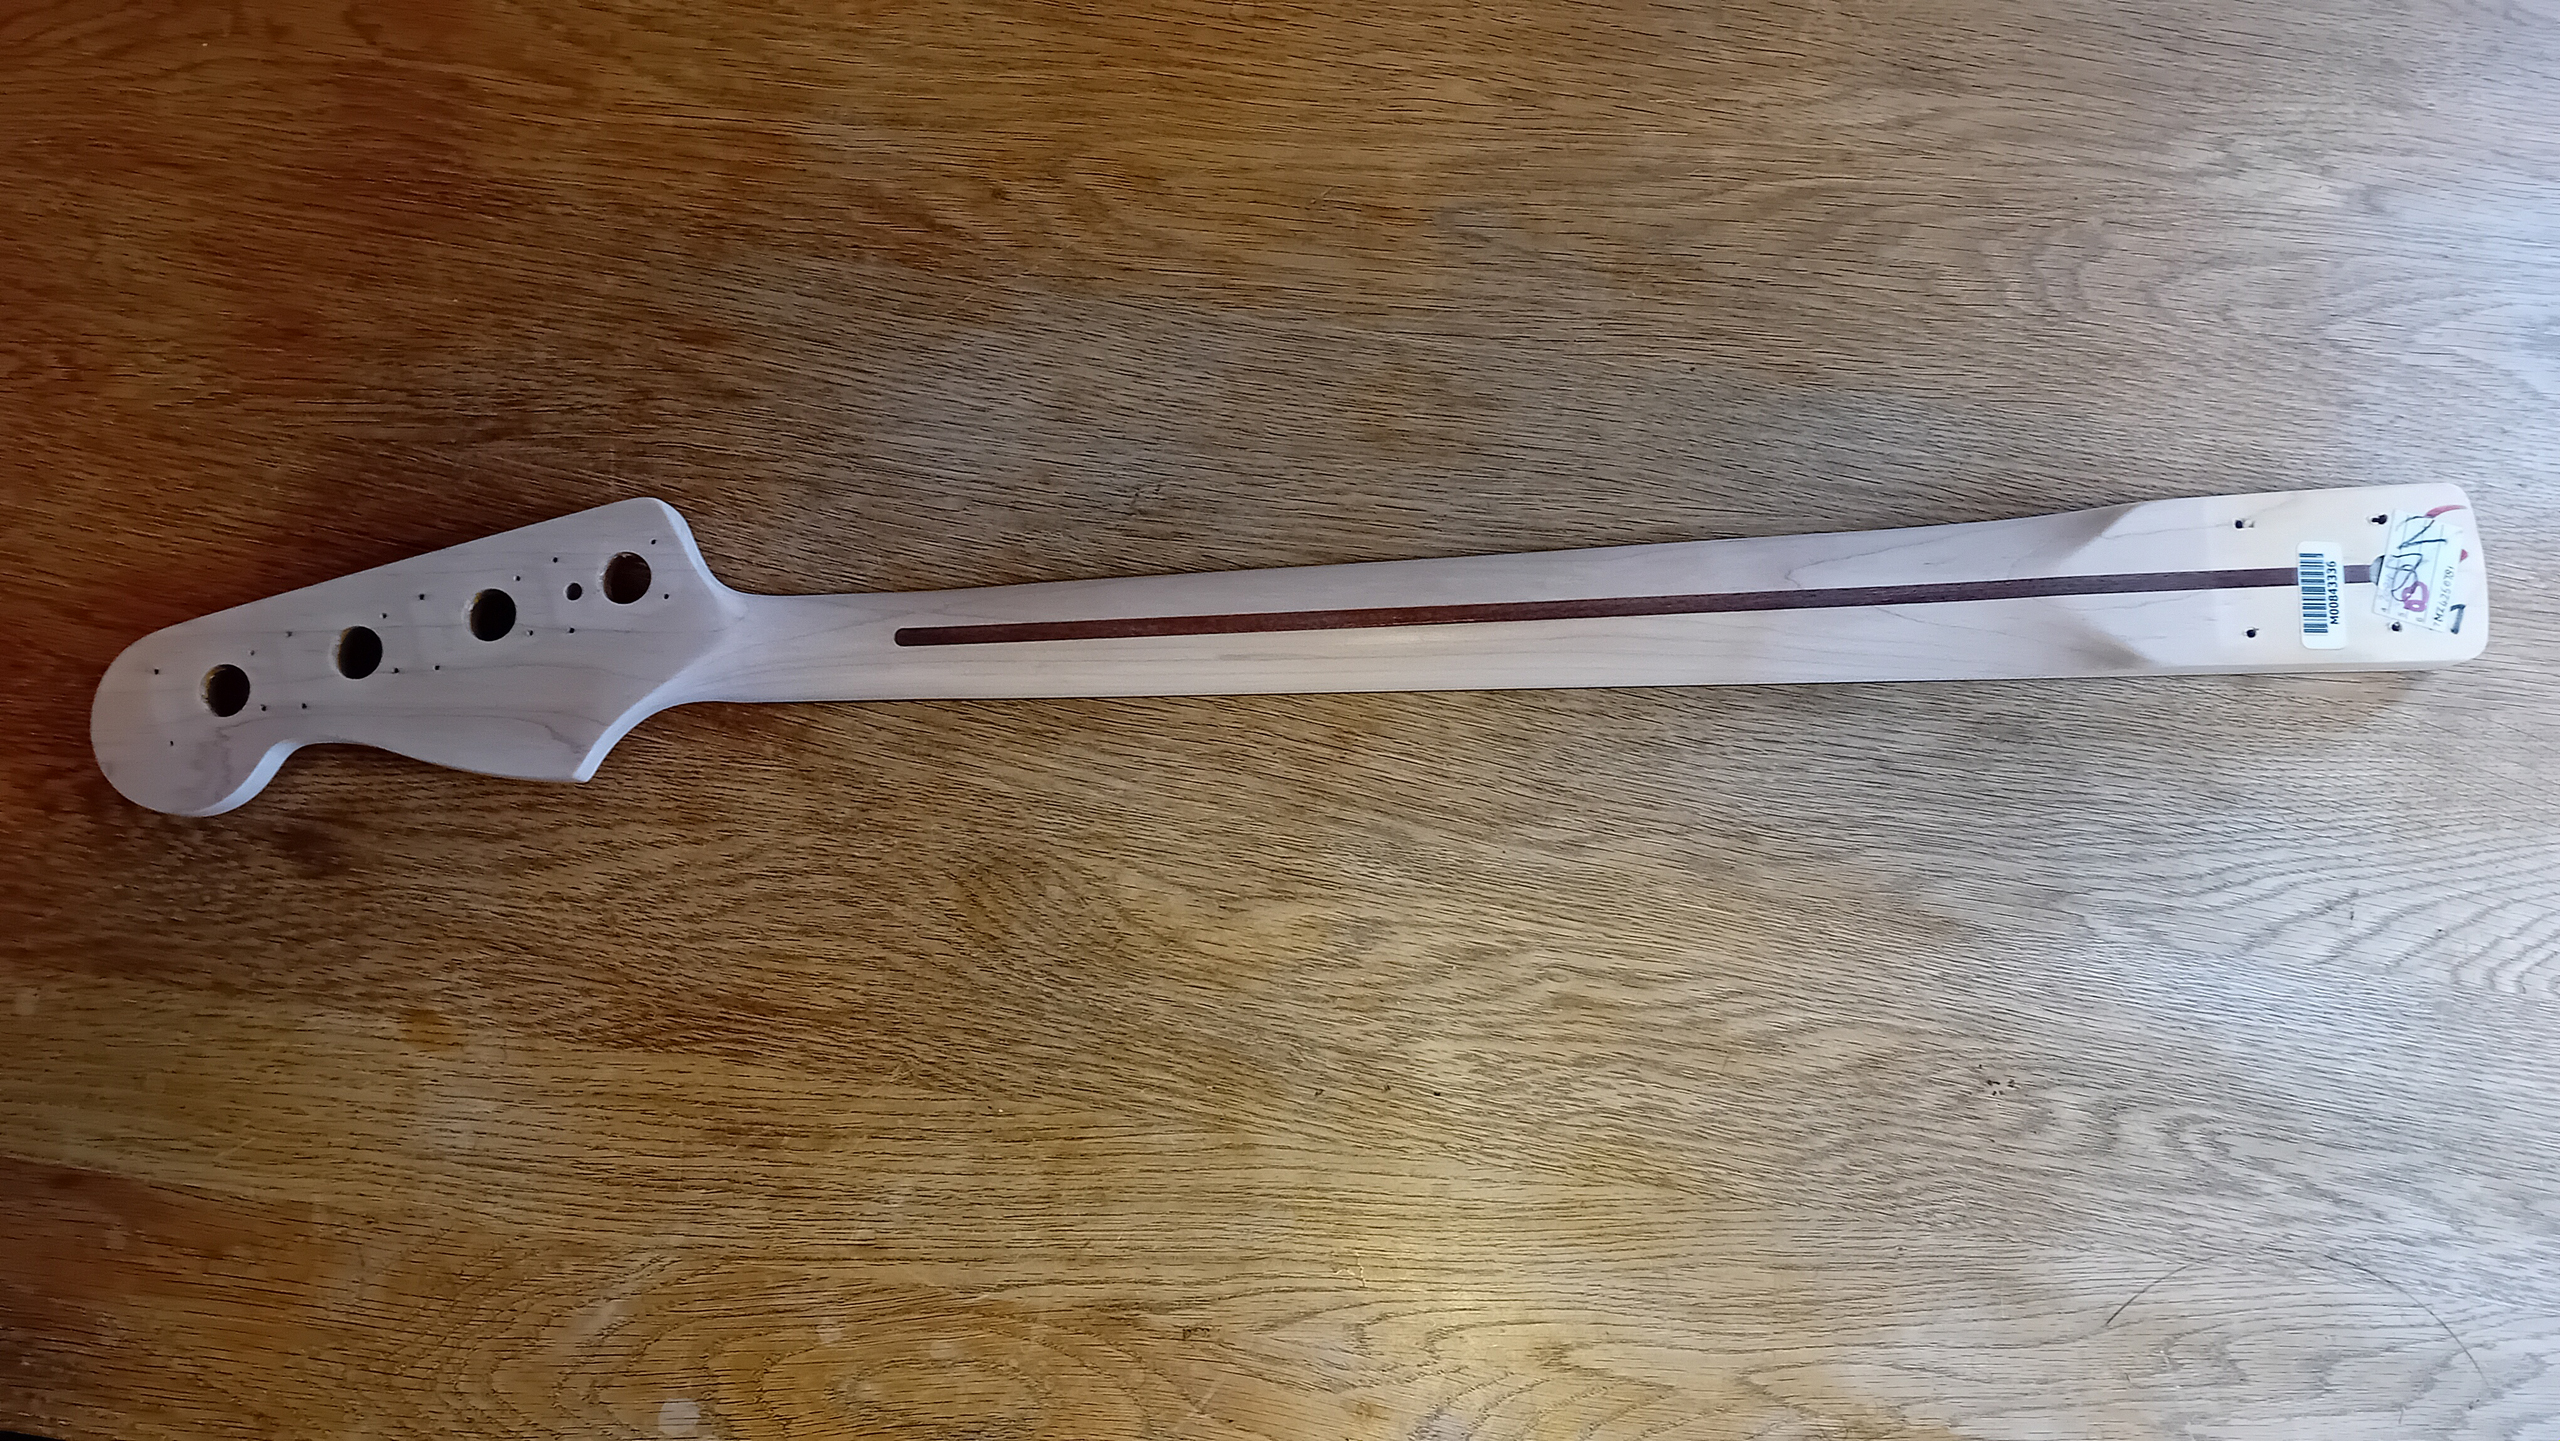
The good news is that the used neck has, apparently, still got the usual original stamps and stickers of a real 2004 Fender neck, in-situ at the heel. There’s even a bona fide serial number to check up on the Fender serial lookup web page. Checking there – the neck is listed as being part of a Fender production, 2004 Standard Jazz Bass. Even the listed “Blue Agave” colourway is confirmed – with a few smudged impressions from the original body colour left around the edges. These 2004 Mexican necks had a rosewood fingerboard, and the maple construction, (with a walnut stripe), would have originally been finished with a coat of Fender’s urethane topcoat. If I can get it restored and playing again – it should be the perfect companion for a new, modern, Fender Mexico replacement body.

Confirmed then, as a 2004, Mexican made, Fender Jazz neck – however, the headstock logo was always an obvious, “non-official” modification. For one thing – it clearly says “Precision” instead – and that’s so obviously a retro-fitted logo. (The waterslide has split in the centre and it’s entirely the wrong design for a 2004 Mex neck. A Precision neck is also wider at the nut. It’s likely that the headstock was re-badged as part of some kind of DIY P/J build – or repurposed for use on a Precision, and used as a “conversion” type neck).

The headstock has also obviously been stained with a rather-too-yellow “vintage amber” dye, which doesn’t match the pinky/amber/tan colouration, of the 20-year old maple on the back of the neck – which appears to have mellowed quite naturally. The new colouration is also slightly blotchy and uneven in places, and there’s also even a bit of tacky sticker residue, at the top edge. I could probably re-use the neck just as it is – but with a couple of “strikes” already chalked-up regarding the finish and the decal, (and with some additional chips and dints, and more involved structural work to do on the nut – more of that later) – I’m already beginning to think that I might be looking at a much more comprehensive re-finish…
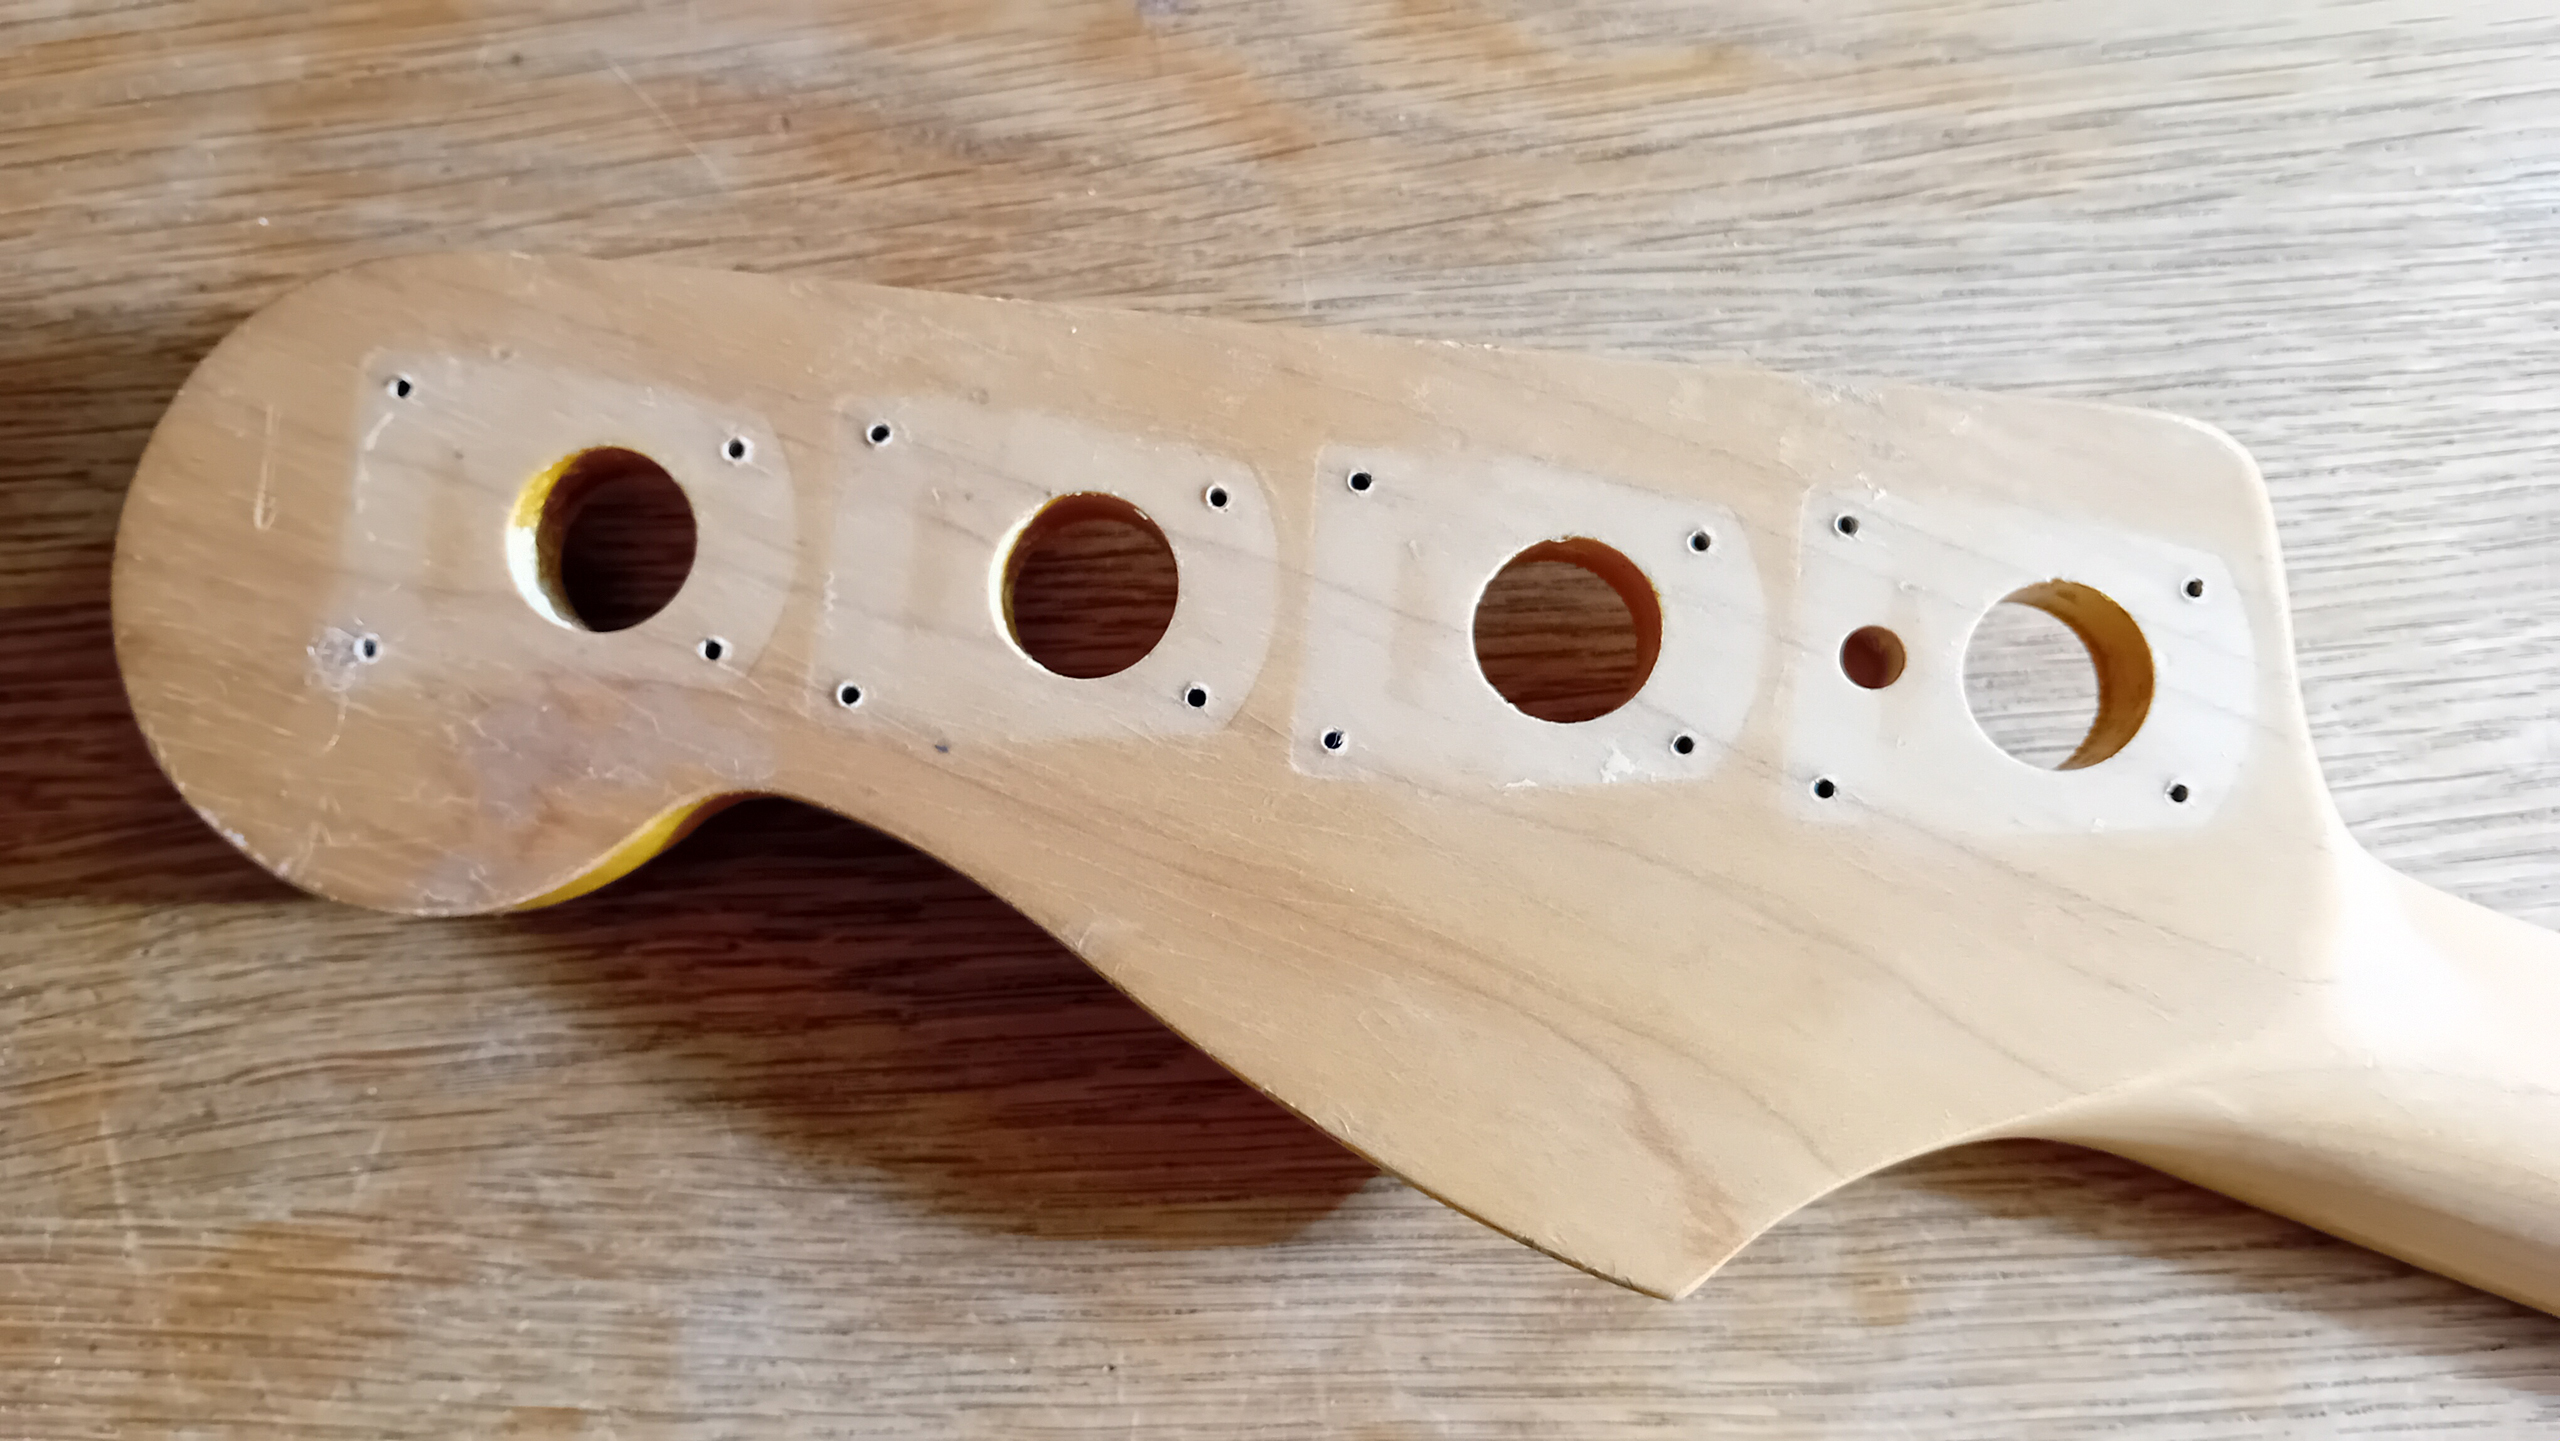
Turning the headstock over – the original polyester finish is a bit banged up, and there’s considerable wear over what looks like an irregular “shake” in the grain, below the outermost peghole. (It only really shows at the back of the headstock). It looks like the finish here has lifted and misted slightly. I also notice that the headstock appears to “spoon” slightly, along it’s length. Normally – with Fender necks set to “flat” – the heel and back of the headstock lie flat on the bench. That is – they’re flat and co-planar. In this case – the scroll end of the headstock lifts slightly off the bench – as if the string tension has pulled it slightly forward over time. Looking along the line of the neck – everything else seems to straight enough – with the distortion apparently occurring only in the “paddle” of the headstock. Hopefully – that shouldn’t affect the playability at all. The distortion is only a couple of millimetres over the length of the headstock, and most of it appears to occur behind the line of the string tree. I wonder if the movement has got something to do with that shake in the grain of the maple?…
Otherwise – the only other thing of note, at this stage – is to observe that the neck is factory-drilled for a set of Fender “Standard” or “Highway One” machine heads. These have a slightly smaller footprint than most “vintage” style bass tuners, and it may not be possible to retro-fit some tuners, and keep the current holes hidden. It’s also interesting to see how the tuners have protected the colouration of the wood underneath, over the years. This is a further practical demonstration of the usual “natural” change in colouration, experienced by a 20 year old Mexican Fender neck, and it will be useful information to bear in mind for my (now increasingly likely) re-finish.
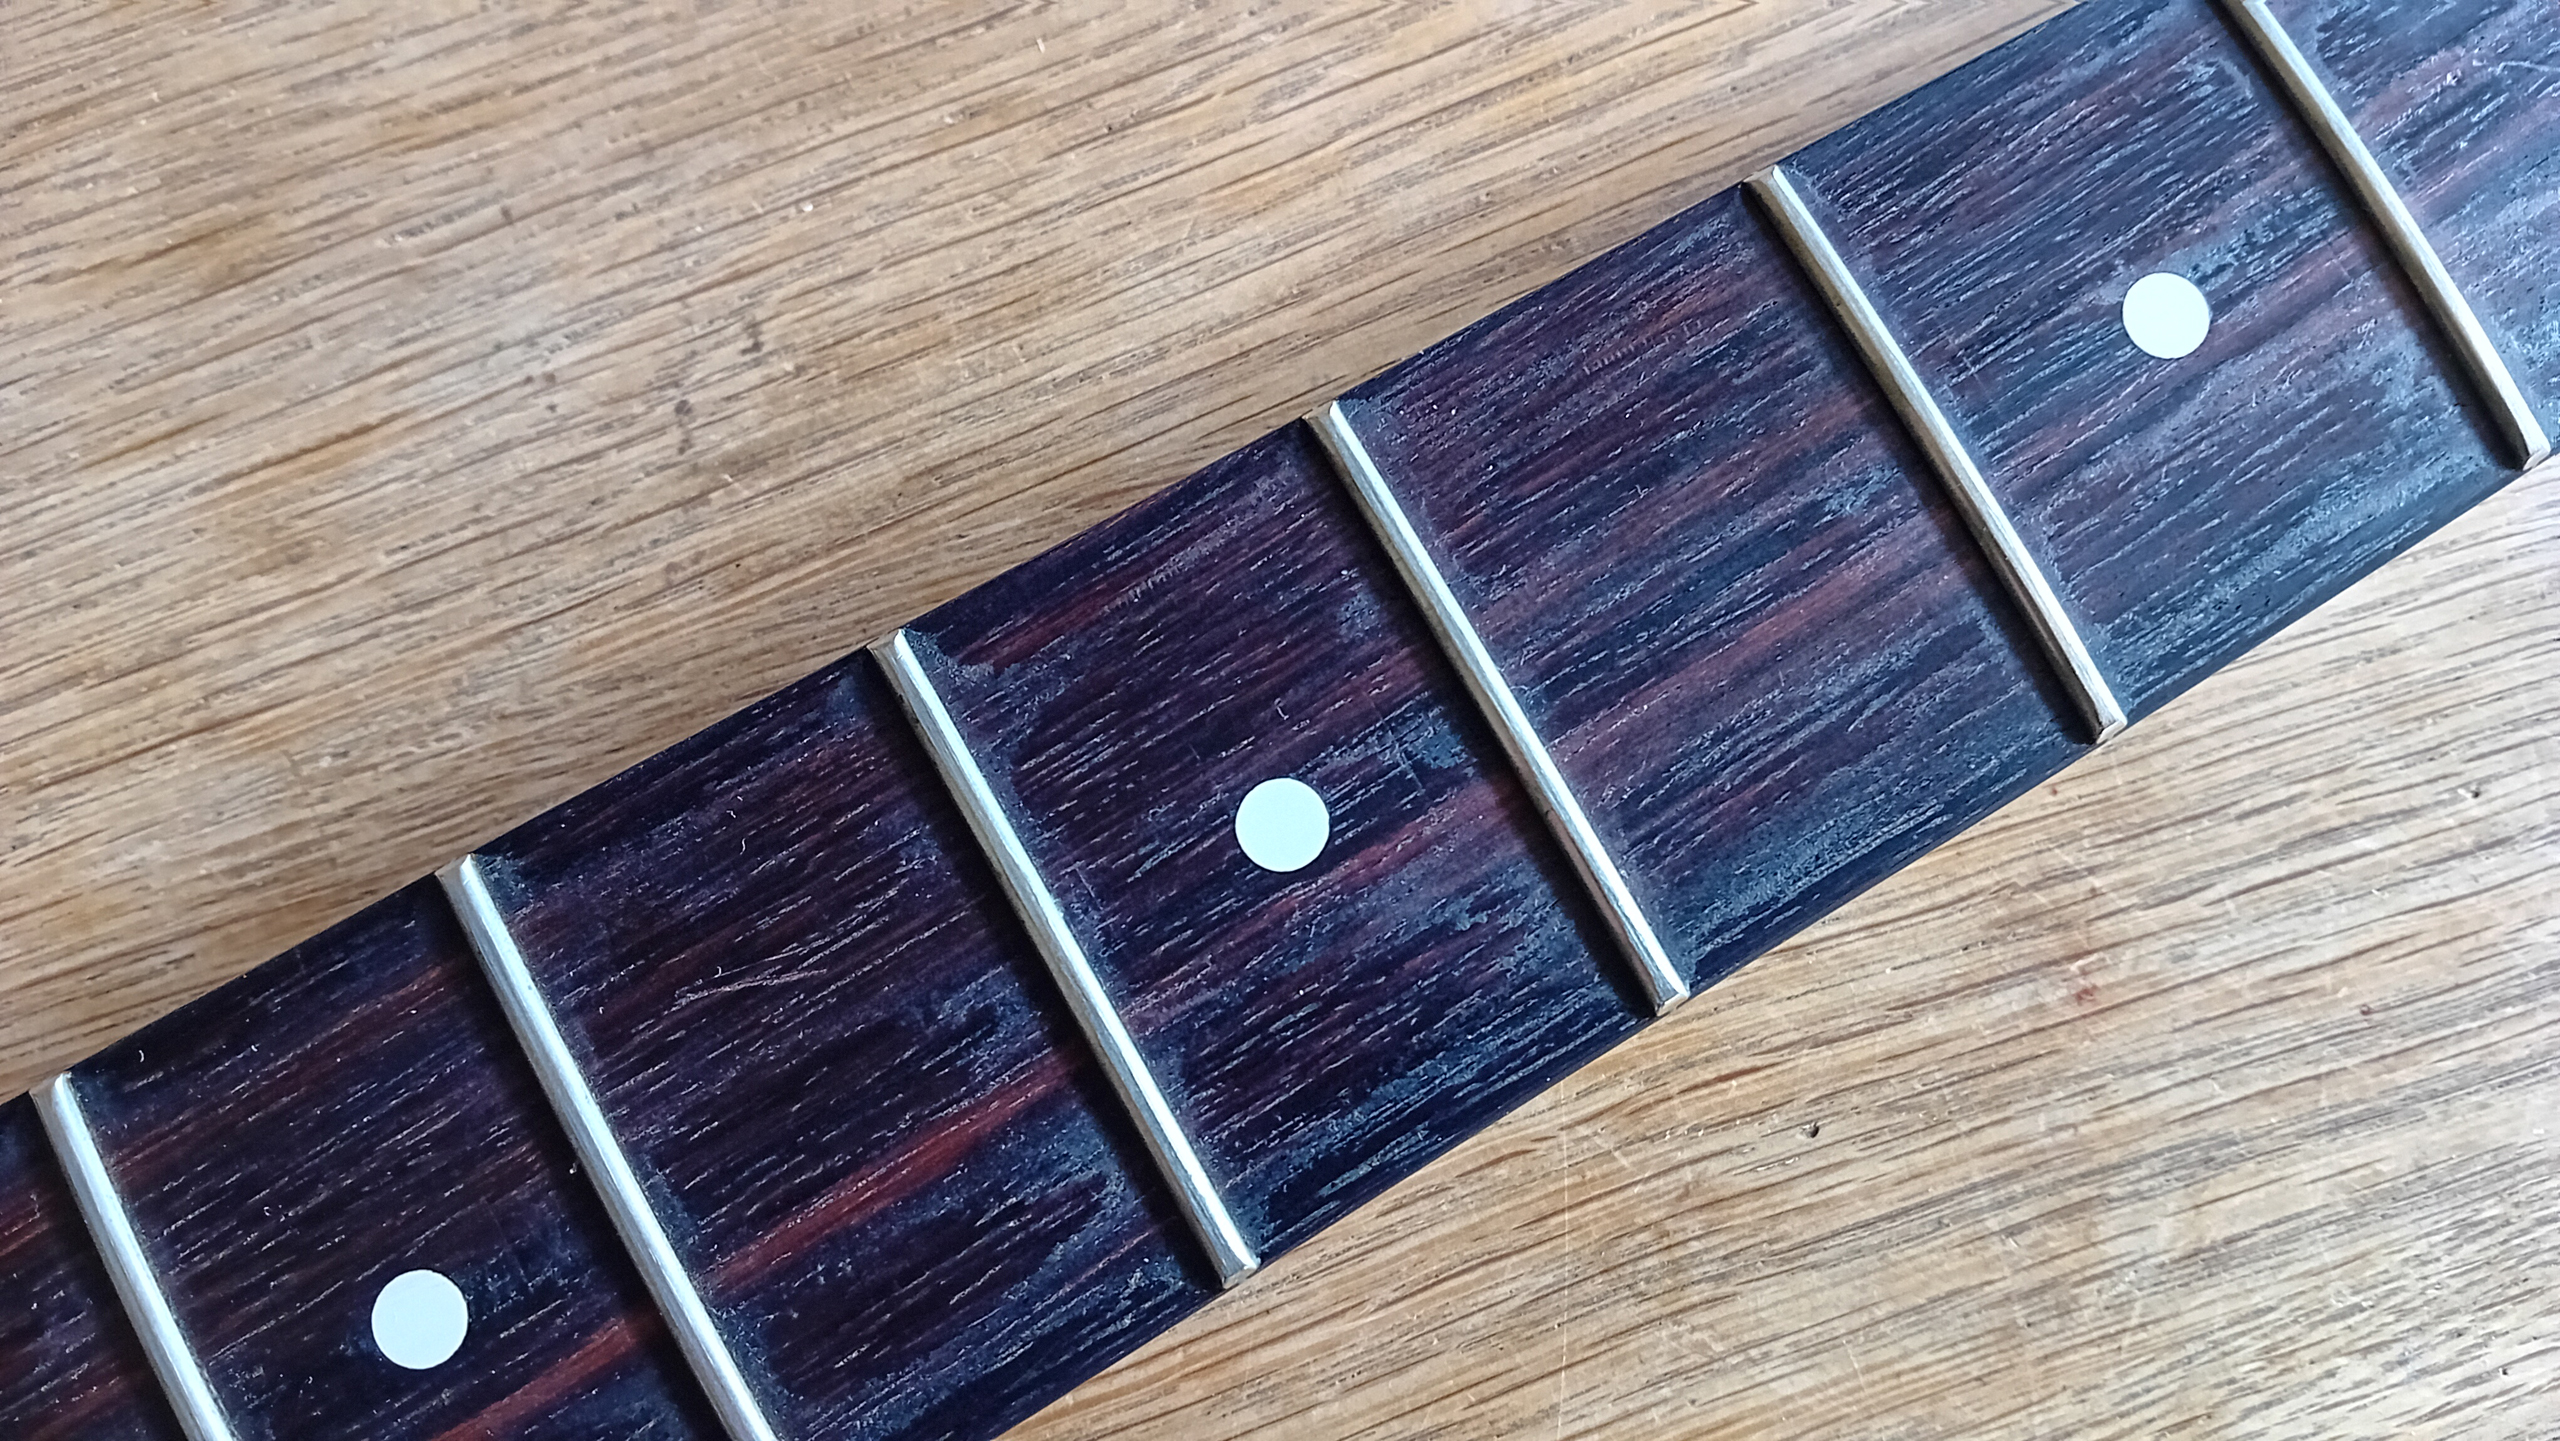
As per the original specification – it’s a rosewood fingerboard. Nice and dark with age – but still displaying something of the typical streaky and “purpleish” characteristic of dyed Indian Rosewood, under the expected, accumulated grease and grime. The “medium jumbo” frets look a bit worn – but I should get away with them for a little while longer yet. With only a few major dings and flat spots, they might require a bit of levelling and polishing to get things back up to scratch – but if I do have to consider a re-fret – I’ll just have to embrace that with the same spirit of learning, as the rest of it. I’ve never actually tried re-fretting a neck myself yet – but if this happens to be the example which opens up the opportunity, (or necessity), to learn a new skill – then so be it.

Apart from the change to the face of the headstock – the other main “catch” with this used neck, is the “modification” at the nut slot. Someone’s obviously had a go at changing the nut at some point – and they’ve managed to gouge the edges of the slot, and lift a small section of the grain. There’s also a depression left by a roundwound low “E” string – presumably from a drop. It’s all rather ragged and unfinished-looking – but I think it’s just about saveable…
So – with a full refinish almost certainly on the cards – it makes sense to deal with any “physical” repairs first.
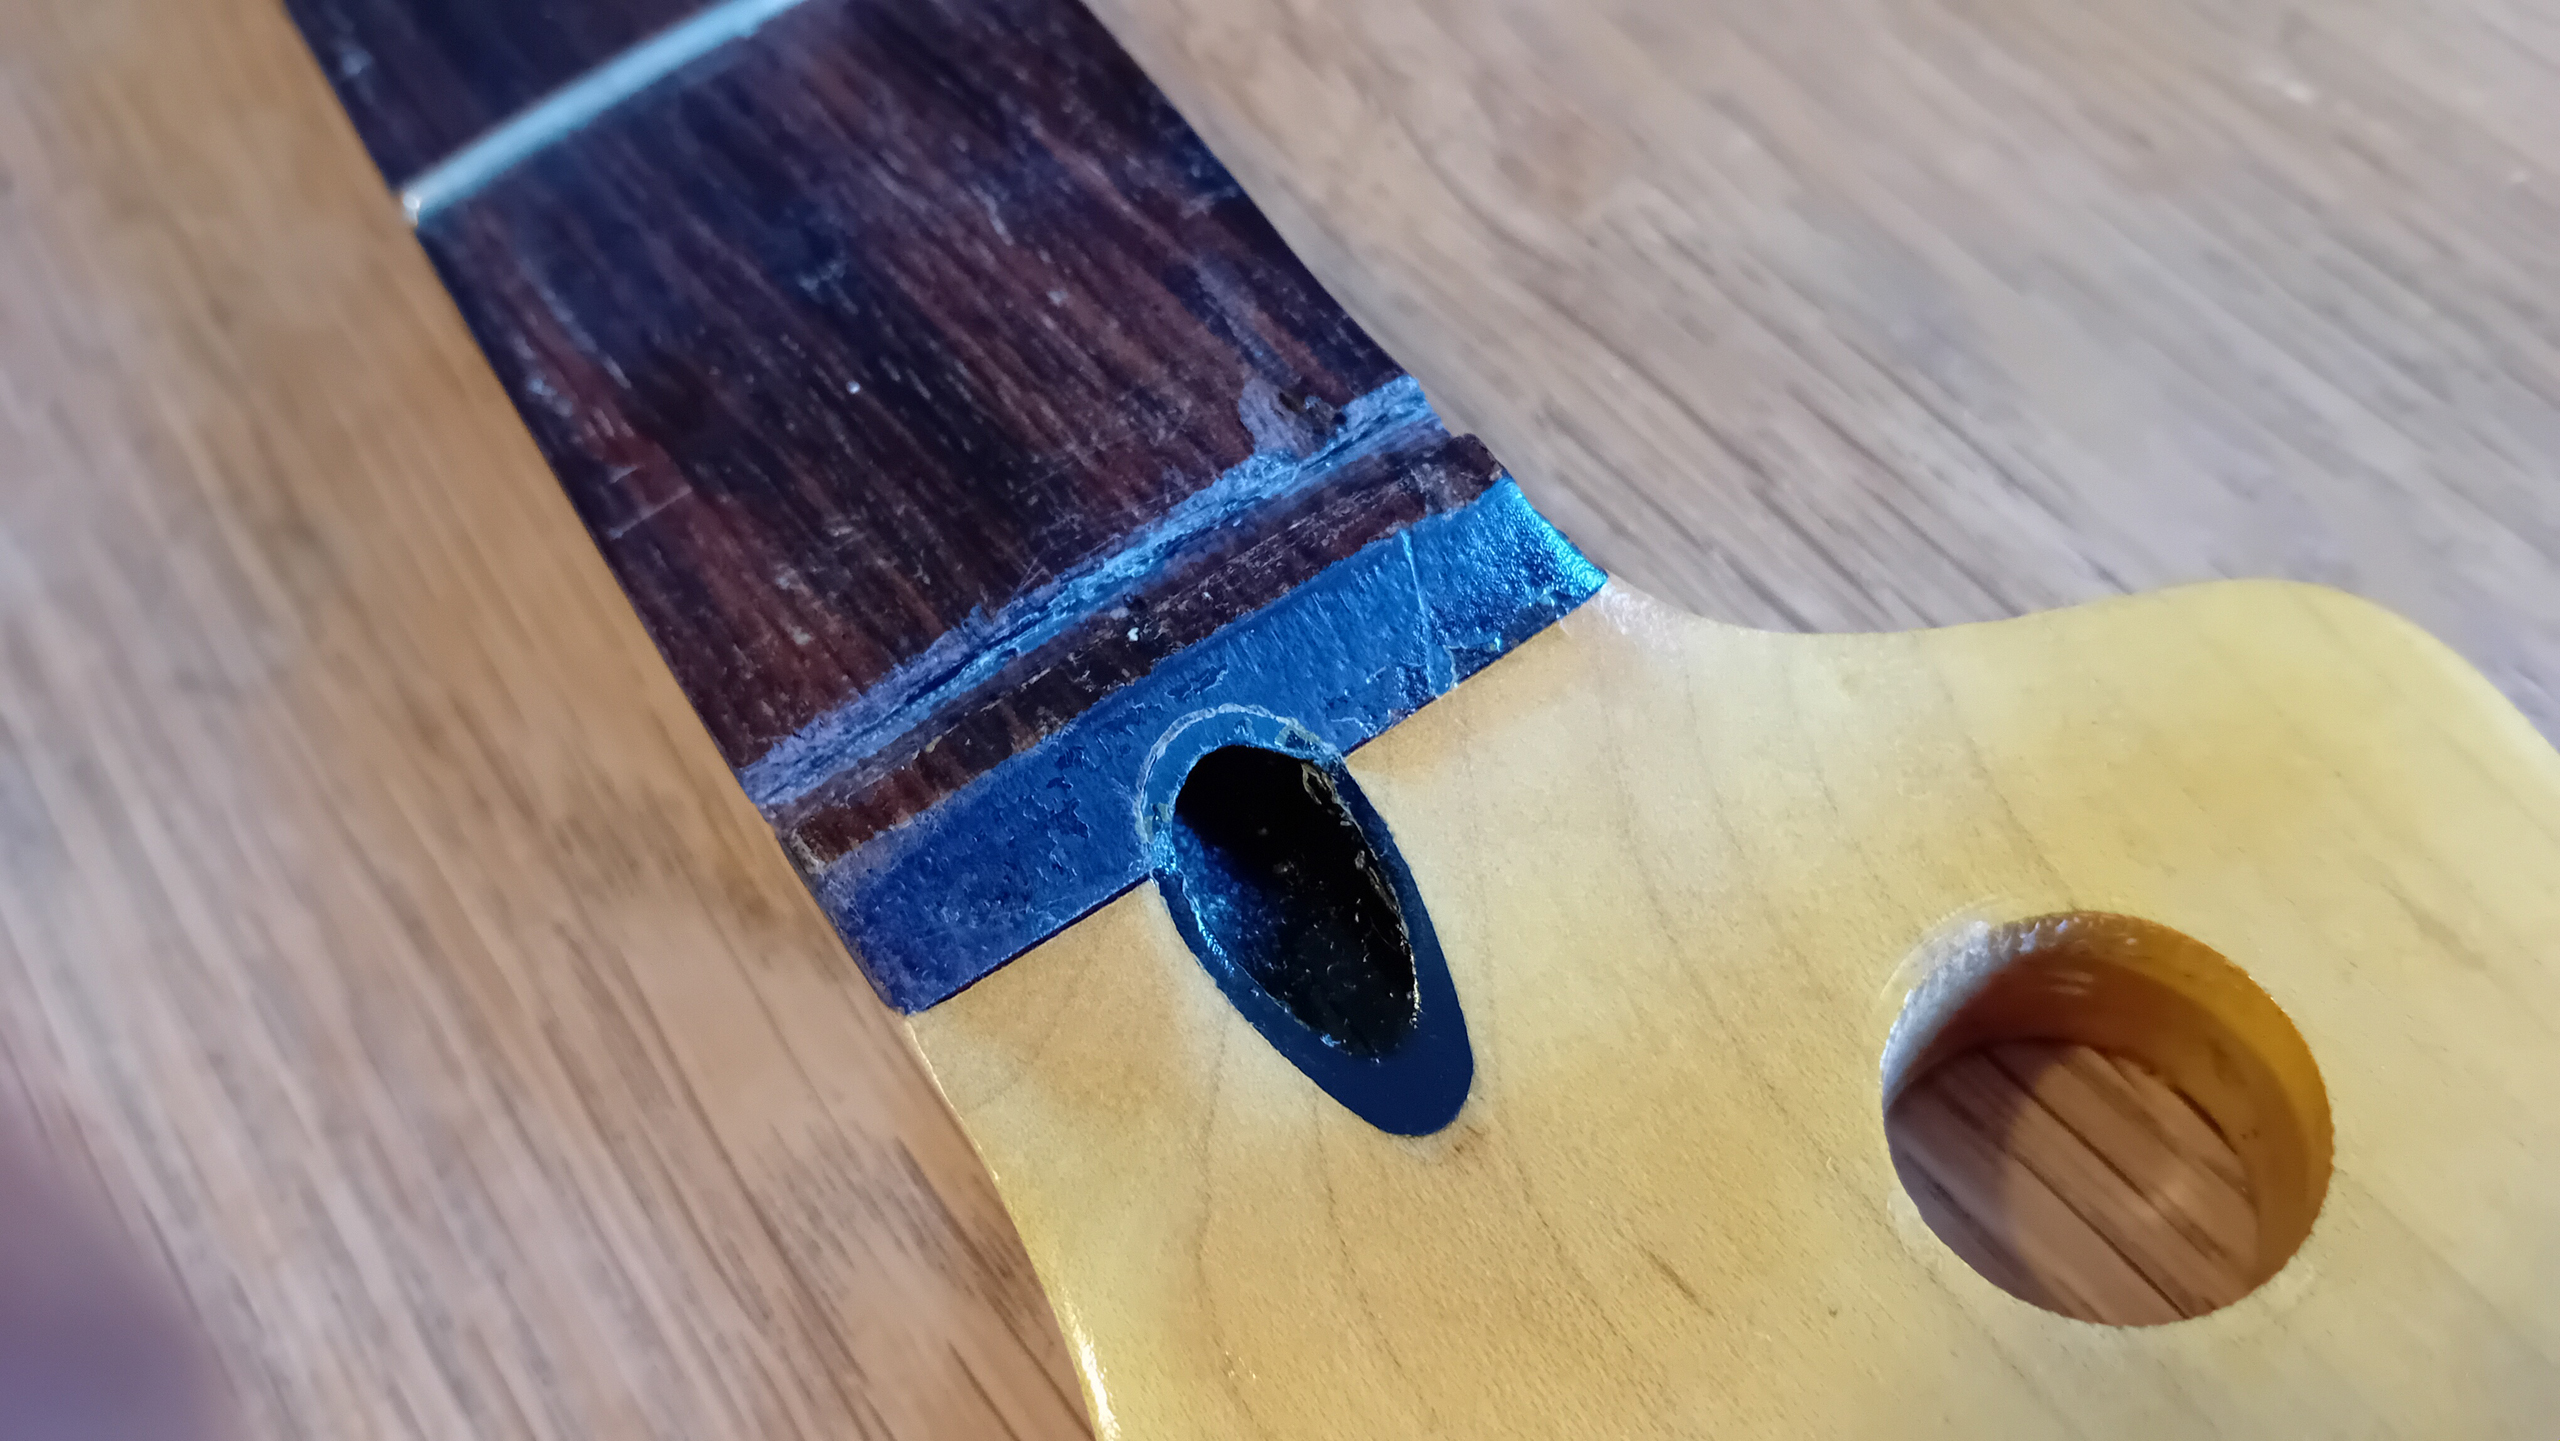
Looking in from the headstock end – you can better observe the gouging at the sides of the nut slot. Given the missing chunk of fingerboard – I’d guess that the original nut might have been clumsily removed – with attempts to loosen it around the edges by cutting, and then extraction by pulling from the front. (In my experience – it’s usually better to gently tap the nut out from the side). The damage to the nut slot means that the sides of the slot have become sloped and irregular, and the slot now appears to flare slightly towards the bass side. What’s left of it probably won’t hold a new nut firmly enough – and I’ll have to look at repairing the slot, to get it closer to it’s original shape and dimension. Looking down at the bottom – it looks like someone has also tried to deepen the cut, (perhaps in an attempt to provide a more solid footing for the new nut). This has further exposed the outside wall of the truss rod adjuster “plug” – the tubular piece of walnut(?), which runs below the nut. The neck came supplied with a new “Black Tusq” Teflon nut, which has a curved base. I’m not sure if the original nut slot would have had a curved, or flat bottom – but it looks like the shape of the base may have also been modified…
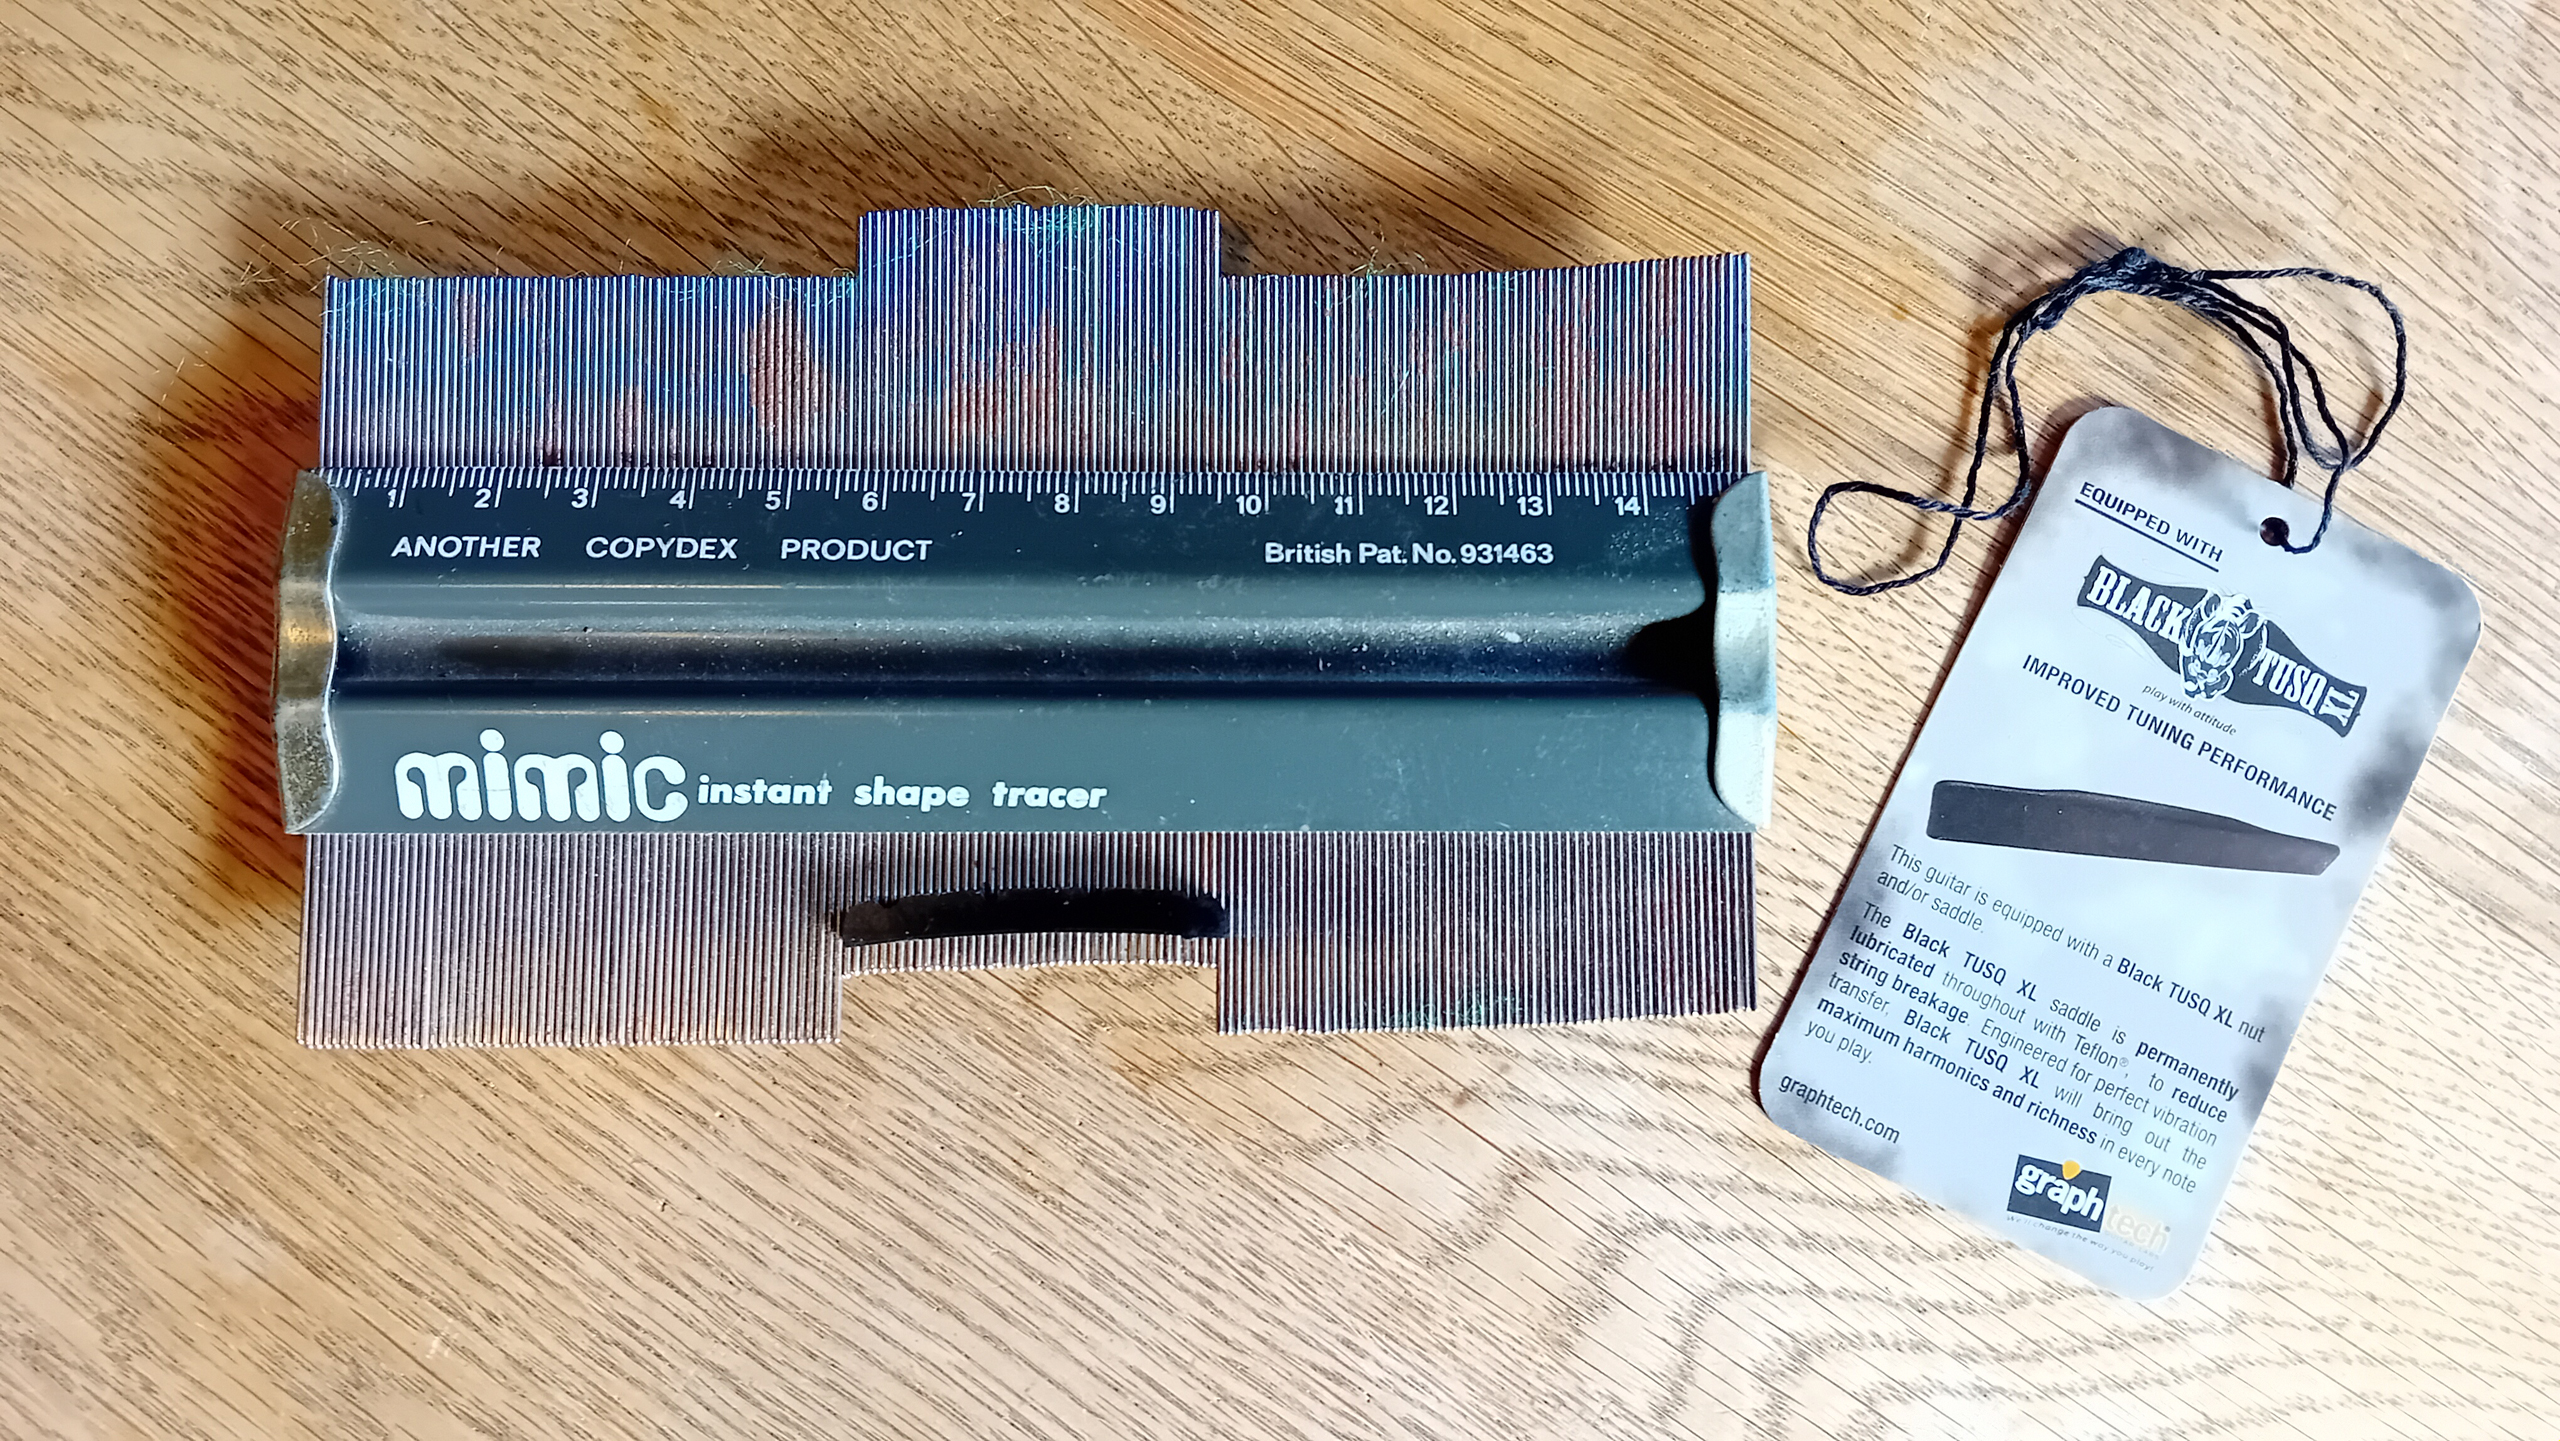
Checking with a profile gauge – the reality is somewhere in-between. The base of the slot is fairly flat – but it also has a bit of a crown. I’m happy to use the supplied nut if I possibly can – but the slot will need re-shaping first – so that the curved base will sit properly, and in full contact with the bottom of the slot. The question is… “has the slot already been over-cut so that the new nut will end up sitting too deep?“. I’ll only really find out by installing it, and then taking some measurements. (Maybe even trying it with strings). Before all that, however – I’ll need to repair that slot, so the nut can sit straight, secure and square again.

I’ve obtained a short length of dyed(?) Indian Rosewood, which appears to have a similar colouration to the wood on the fingerboard. I’m going to try and fill the gouges at the edges and base of the nut slot, with some sandings from this piece – bonded with thin cyanoacrylate adhesive, (super glue). The ends of my sample are protected with wax – so a small piece has to be sawn off, to enable me to obtain some sandings from the clean edge. It’s then just a matter of creating some fine sawdust. Half an hour, or so – just me and a piece of sandpaper, and the radio…

Looking at the damage, and how the new nut sits – I think I’ll get a better result if I attempt to fix the base of the slot first. I might then be able to seat the new nut a bit more securely, and then use it as a kind of former, for the repairs at the edges. I take some of my fine rosewood sawdust, and drop it into the slot with a small spatula – building the base up by a millimeter or two, and using the nut as a kind of stamp, to distribute the sawdust so that the shape of the base will help form the curve of the slot. It also helps to force some of the fine powder into the irregular gouged corners, at the bottom of the slot.
The Tusq nut is supposedly impregnated with Teflon – so it shouldn’t bond too well with the cyanoacrylate. However – I’m all for taking precautions. I don’t want to have to glue the nut in, and have to rip it out again – potentially causing even more damage. Once I’ve piled up enough rosewood dust at the bottom of the slot – I wrap the base of the nut with a single thickness of PTFE tape. The type that you use for plumbing joints. Note also – that the neck finish around the sides of the slot and below, is protected with masking tape before any glue gets applied. I don’t want to mess up the existing finish…
I then use a whip tip applicator to drip small drops of acrylate onto the rosewood sawdust. The dust quickly soaks up the glue, and as it soaks in – the colour changes to a familiar dark brown, which almost exactly matches the fingerboard. The glue dries very quickly – but there’s enough time to position the nut as I want it, and then to press it into place… (Careful… don’t glue your fingers to the nut, or the neck!).

It takes a little while for the glue to fully cure, and deeper thicknesses will take longer to fully go off. Therefore – once the nut is in the right place – it’s usually a good idea to hit the area with a bit of accelerator. This sets the glue almost immediately. Leave it for a while – just to make sure…
Once glue has set firm – the nut can be tapped out from the side with a fine drift. The nut itself comes out fairly cleanly and easily – but the PTFE tape shreds, and pieces stay stuck in place. The repaired base now has to be carefully cleaned with a nut seating file. This helps remove the PTFE tape residue, and then begins to properly shape the base of the slot – so that the bottom corners are properly square, and the base is smooth and correctly curved. The process may have to be repeated – until the base of the slot is correctly shaped all along it’s length, and the nut is properly supported. Once the nut is sitting properly, and there’s no gapping visible between the nut and the slot, when looking in at the sides – the upper sides and edges of the slot can be rebuilt, using a similar process.
I mask the fingerboard off – so that only the areas to be repaired are left exposed. I then position the nut in the slot, and use a capo to clamp it firmly in place. Using a small spatula – I then drop sawdust between the nut and the edges of the slot – along the pegboard edge of the slot only – using the spatula to press dust down into the visible gap, at the junction with the Teflon nut. I’m not using the PTFE tape this time. Far too messy – and the nut came out fairly easily anyway. However – looking at the sides of the nut – there are a couple of indentations on one side, which appear to be left over from the moulding process. These will make removing the nut, without damaging the new repairs, just that little bit more difficult – so I use the nut with the clean, flat side facing the side I’m working on. Once the sawdust has been pushed into all the right places – the glue is dripped on along the line of the repair, and is set with a quick spray of accellerator…
Once I’m sure the glue is fully cured – the nut is tapped out sideways again. Once the bottom, and new sides of the slot have been checked over, cleaned out and shaped with the seating file, as before – the nut is turned around and re-seated, so that the “clean” side is set closest to the fingerboard. Once again – it’s clamped in place with the capo, and the process is repeated – this time placing sawdust along the outer edge of the nut slot at the fingerboard side. This time I also include the small area of damage, where the grain has lifted. (The masking tape is cut to expose the damaged area, and shaped to protect the rest of the first fret area). Once again – sawdust is carefullly packed into place, and then set with cyanoacrylate and accelerator.

Once the whole repair has had time to properly cure – the nut and protective tape is removed, and the repair is tidied up and smoothed with fine grit paper. Using a small piece over a piece of flat wood helps to blend the transitions in at the edges, and also helps to maintain the sharpness of the new slot edges. It’s also essential whenever levelling fills on flat surfaces. Don’t sand into the slot. Only use a seating file there – so that the sharpness of the newly re-squared channel is always preserved.
The whole end of the fingerboard, beyond the nut, is also smoothed over – in preparation for the new finish, which will eventually extend over the top – all the way up to the nut. I’ve left most of the small roundwound string impression, on the fingerboard side – since a shallow repair might not bond so well, and besides – the string should eventually cover it from view anyway. It’s not as if it’s in a critical part of the neck. Otherwise – the nut slot now looks much more viable, and crucially – it holds the nut, in position, much more firmly. The only question now – concerns the depth of the slot as it is. Tusq nuts are generally prepared to need only minimal slotting adjustments – so if the whole nut ends up sitting too low – I may have to build up the bottom of the slot a bit more to get the nut at the right level where I can set the action correctly at the first fret. I’ll leave it for now, and check it again at setup. It could be that the slightly worn frets will give me an extra few thousandths of an inch to play with. A further, fuller repair might well be inevitable at some point in the future – but I may get away with it for now.
The edges of the slot also still have a couple of tiny irregularities – presumably where the repairs ended up being so minimal – and where there wasn’t enough adhesion to hold the sharpness of the new edge. However – these are virtually invisible with the nut in place, and there’s now more than enough new contact to hold the nut tight and firm – even without a drop of adhesive to secure it. Most importantly from a cosmetic point of view – that chip on the fingerboard has been completely filled, and the colour match is excellent. A few scratches with a scalpel on the surface of the repair, are made to replicate fine grain lines in the surrounding rosewood. Now – with strings on – if you didn’t know it was there, you’d probably never spot it…

As I’m rubbing-back the fingerboard at the nut – and when it comes down to final polishing with fine, 0000 grade wire wool – I extend the treatment all the way down the rest of the rosewood. This not only gives the frets a bit of a polish – it also helps to strip off much of the old, dried fingerboard dressing – letting me get a good close look at the state of play, in the process. There are a few dints and scratches here and there – but no major signs of wear or damage. Once the board has been cleaned and smoothed to an even matte sheen – it’s ready for cleaning and re-dressing. (I’d prefer to get a bit of oil on the board, as an extra protective measure – before proceeding with the rest of the re-finish).

First – the fingerboard is deep cleaned, with a spritz of Crimson Guitar’s Fretboard Cleaner. This gets rid of any dirt and grime from the fine grain, and prepares the wood for a final dressing of Crimson Guitar’s Fingerboard Restorative Oil. The oil is applied, and left to soak in for a few minutes – then the excess is continually wiped away, until the board begins to look dry – but with a rich, oiled sheen. Once the board is fully dry, and it has an even matte sheen – it’s given a final buff over with a clean, soft cloth. A further dressing might be a good idea before the neck gets new strings, (especially if it turns out I need to do any work on the frets), – but this single dressing has already done a great deal to improve the condition, and look, of the rosewood.

Now – attention turns to the re-finish. First to go – is the “unofficial” finish on the face of the headstock. I’m not sure if it’s polyurethane or nitro – but since I want to remove a sizeable area evenly, without removing too much material – I use a flat Stanley Knife blade, which has had it’s cutting edge lightly turned over on the edge of a cast iron angle. This hooks the edge of the blade slightly – creating a super-fine shaving tool. This is used to gradually work away, through the various layers of finish – until pale, fresh, maple wood is reached. The blade is held flat – at a slight angle away from perpendicular – and the finish is removed as the surface is smoothed over. This method has the advantage that it removes only a fine, controllable thickness of finish at a time – and leaves no sanding marks as it does so.

The “new” clear coat actually turns out to be quite thin, and I’m quickly down through the waterslide, to the stained wood below. With some stains – they can penetrate the wood to some depth – so I’m relieved to find fresh maple under just a very thin, coloured, top layer. Once I know what I’m dealing with – I turn my concentration to revealing fresh wood, evenly, all over the face of the headstock. Removing the stain – but as little of the actual maple as possible – whilst keeping the stripped surface completely flat and smooth.

Finally – the newly exposed surface is flat-sanded with grit paper, running from 600 grit – all the way up to 2500. The grit paper is used over a cork backing block, and whilst some of the sanding is achieved using a light, circular motion – final passes are always done across the grain – leaving the surface as free from witness marks, as possible. (For flat areas – it’s sometimes easier, and you get a much smoother surface using the shaving blade). When it comes to the finer grades of grit – especially on the back of the neck – I usually let my fingers take over. It’s amazing how sensitive finger tips are – and they can often reveal tiny imperfections which remain invisible to the eye. I also think it’s a good idea to always keep an eye on the colour, and amount of dust and shavings from the work. They give a good idea of what’s coming off… Ideally – I want to remove all of the stain, but as little of the original wood as possible. Even down to the ultra-fine dust, from the final polishing passes, with the finest grits…
Eventually – all of the maple is stripped back to fresh wood, and the treatment also extends up the sides of the fingerboard, so that there’s no “edge” to the finish under the fingers. In the end – a little dye still remains around the edges of the top peghole, where there appears to be a slight depression from the original bushing, (or perhaps it’s removal). However, it’ll be fully covered by the flange of it’s eventual replacement – so I’m not at all bothered by it.

Then – turning the neck over, and seeing the difference between the stripped headstock, and the rest of the finish – I decide to completely refinish the whole neck. Although I might be able to finish the face alone, much better than it was – it’s not the original any more, and even my best efforts might not approach the quality of the original Fender neck. I may as well take advantage of the fact that in stripping the maple completely – I’ll have to smooth and prep the rest of the wood back to the same starting point. Although I’ll lose the original “slightly aged” character, and colour, of the maple – I’ll at least be able to iron out most of the physical dints and dents – and I should then be able to provide a much more “consistent” new finish, all over. It will be interesting to see how close I can get to an “original” Fender finish, and whether I can match that subtle age to the colouration, another way…
Stripping the urethane finish is done using a similar shaving tool as before. Lightly peeling back the polyurethane in thin “curls” – the finish is gradually removed until only the finest surface layer of the aged wood is removed. The original pale colour of the maple is gradually revealed again – with special care to ensure that the “mouldings” of the piece are left as clean and sharp as original. Once again – it helps to keep an eye on the shavings and sandings, as the neck is cleaned back.

Gradually – the whole of the neck is stripped of finish – leaving only the labelled heel untouched. (The “aged” discolouration here is minimal, due to the wood in the neck pocket being constantly shaded. It’ll be a useful indicator when it comes to matching the original colouration again). The urethane finish at the heel is also very thin – so I make sure that the transition is as subtle as possible – leaving as much of the original as I can. I’ll feather my new finish into the old. Of course – the original Fender labels and written marks are left completely untouched. The back and sides of the headstock are similarly cleaned back – until finally – the neck is probably back to it’s original, pre-finished state. All that’s required now, is a careful polishing with successively finer grits. Again – 340 through to 2500. Getting the smooth feel of the back of the neck is important. Once again – for the finer grits – finger touch becomes most important. At the end of the process – the neck is silky smooth to the touch, and it turns out that most of the dints and dents extended down only into the top finish after all. The wood of the neck below, is almost like new again.

Once the work has been thoroughly cleaned and dusted down – it’s ready for a protective coat of sealer. Since the neck was originally finished with polyurethane – I’ll stay true(ish) to the original spec, and use a wipe-on type poly finish. If I can get a sealing coat flat enough, and thin enough, through wiping – I can then hopefully deal with any colour or tint coats with an airbrush over the top – eventually sealing and isolating the colour under layers of clear coat. (It’s always much easier to apply a stain or tint with a spray, than it is to wipe it on – although spraying polyurethane comes with it’s own challenges…) The combined base coats eventually need to be flat enough to allow me to apply the waterslide decals over the top – and yet thin enough, to leave enough scope for more generous protective clearcoats, over the top. I want to try and build up a Fender-like thickness of finish, and also fully bury the decals, so they can be flat-sanded without damage.
I’m using Crimson Guitar’s own wipe-on poly finish for the base coats. This needs to be thinned with a little with water, to get it to the right consistency. I’ve always found that wipe-on urethane finishes are prone to “dragging” as you apply them – almost drying out under the applicator cloth as it’s wiped over the surface. This can sometimes leave an unattractive, thick and “smeared” look to the immediate finish. Thinning the stuff means it goes on a little thinner… a little easier all together… but you now have to watch out for any drips or runs, which are a much more likely consequence of an altogether “runnier” product. It still dries quickly enough, however – so it’s best not to try to cover too large an area at once – and it’s still absolutely essential not to overwork drying areas, which always risks “pulling” or “dragging” the freshly layed finish. In terms of technique – the application has similarities to the French polishing technique, I’ve previously used with shellac, (which also dries super quickly). It might even be possible to charge a prepared applicator “rubber” with the liquid polyurethane, and then apply it evenly over the surface, in a similar way to shellac. As it is – I’m able to achieve a reasonably smooth, regular and thin coating, using just a piece of clean, soft cotton cloth – recharging the cloth periodically from the bottle. The knack seems to rely on keeping the cloth wet, and in keeping the application constantly moving – feathering the passes together whilst picking up on drips and runs in the finish, as you go – and trying not to drag on any of the previously laid poly as it dries. Sounds much easier than it actually is – and I’m thankful for my previous experience with shellac. (A bit of related practice always makes any task go a little easier…)
At the heel end – the new finish is carefully feathered into what remains of the original finish – beyond the obvious “line of transistion”, which coincides with the lip of the neck pocket. At the headstock end – the pegholes are carefully plugged with paper, and the coverage is gradually extended over the back and sides of the headstock. The irregularity of the shape means that wiping the finish becomes significantly more difficult – and special care needs to be taken to ensure that the application is flat – with no visible wipe marks, or sags or runs down the sides.

Each coat is usually touch dry in under 5 to 10 minutes, and once a consistent, smooth, thin coating has been applied to the entire back of the bass neck – it doesn’t take long for it to dry enough, and it can be flipped over to allow for similar work on the face. It’s always a good idea, however, to pad the area where the neck is laid. The drying polyurethane is still soft, and will remain prone to damage until it’s cured. Full curing can take as long as 14 days.
On the inside of the little walnut plug, which hides the truss rod adjuster nut – a single application of the wipe-on poly is achieved, using a clean cotton bud. Care is taken not to leave any lint or cotton fibres behind, and a single coat is enough to seal the wood, and restore an even sheen.


Once a full, covering coat of the wipe-on poly has been applied, and once the new finish has had a few hours to dry – I carefully run over the whole piece with a grey Mirka Mirlon (Scotchbrite) sanding pad. The light grey Mirlon pads are the equivalent, (I think), of about 1500 grit – and softly rubbing-back the first coat of finish not only “regularises” the finish to a consistent, soft, satin sheen – it should also help to key it, for the next tint coats, and “body” clear coats. After lightly rubbing-back – the neck is left to dry for a little while longer. Next – (and before the wipe-on poly cures completely) – I’ll spray some thin, toning colour coats…
