

Since the wood on this reconditioned, original, 2004 Fender Jazz Bass neck has been stripped, and is still quite pale under the thin layer of PU sealer – it could now do with a bit of colour. I don’t want to stain the actual wood – so my colour will be applied over the seal – using the PU as a barrier coat. I’ll use some light amber tint nitro, (by manchesterguitartech). I’ve never really had a problem shooting nitro over polyurethane – besides – there’s only the lightest coverage from the sealer. (I would have used nitro sanding sealer if I had any spare – but I want to get the nitro body coats on before winter sets in, and it’s really not worth ordering up one rattle can of sealer – just for a few squirts).
Whatever the medium – any “colour” or “tint” should, ideally, be built up quite gradually – so that it looks consistent, truly transparent and “in” the wood. The light tint shades quite subtly – with each successive coat slightly deepening the effect. Spraying the neck is like any other nitro spray job. Light, mist coats at first – to promote proper adhesion – followed by slightly thicker coats, applied as a series of overlapping passes. Let the nitro flash off to touch dry, before repeating. I just need to build up enough nitro on the face of the headstock – so I can flat sand and then apply decals, without any risk of sanding into the colour tint. However – I’m also concious that I don’t want to end up with the lacquer getting too thick. Once I have a good colour – I’ll need to isolate that under a few layers of clear, before I even think about putting the waterslide decals on. And then – there will be subsequent coats to bury the waterslides. This light tint builds up quite gradually – so it’s controllable – but it can also colour up quite quickly, so you need to keep an eye on how the tint is developing.

Whenever I’m spraying necks – I tend to find that I usually only need to mask off the flat area of the fingerboard, over and around the nut slot. Normally – you can protect the face of the fingerboard well enough – by aways holding it in the “shadow” of the rest of the neck, and away from the spray. The finish can then be applied right up over the edges of the fingerboard, (and if any overspray does accidentally make it round to the front – it can usually be cleaned off easily enough, with some fine wire wool). At the sloped face adjacent to the nut – where the truss rod adjustment is made – a small ball of tissue paper is inserted into the plug, to keep the mechanism free from overspray.
In practical terms – I usually find it easiest to deal with the back of the neck first – extending the coverage all the way up the back of the headstock, and the sides. Once these have been largely dealt with, and the nitro is dry enough to handle safely – the neck can be wrapped, and the nut slot protected with masking tape. This then presents the face of the headstock nicely – with the rest of the fresh nitro either covered over, or in the shadow area. (It’s not really a problem if the sides of the headstock do get a little extra coverage at this stage. It should “feather-in” easily enough as the neck is finished). Since the lacquer spray can pass through the tuner holes – it’s usually a good idea to plug them with screwed-up bits of paper towel.

As the colour tints are applied – it’s always adviseable to check the depth of the developing colour, periodically – and under various different lighting conditions. Working on the back of the neck first, helps to get a good idea of how quickly the tint is building up. The photo above was taken after only the first few mist coats of the tint – but under the “warm white” LED lighting of the workshop, (and with the camera compensating for it’s automatic colour balance). It looks quite amber already. Under more natural light – the tint is actually still quite subtle.
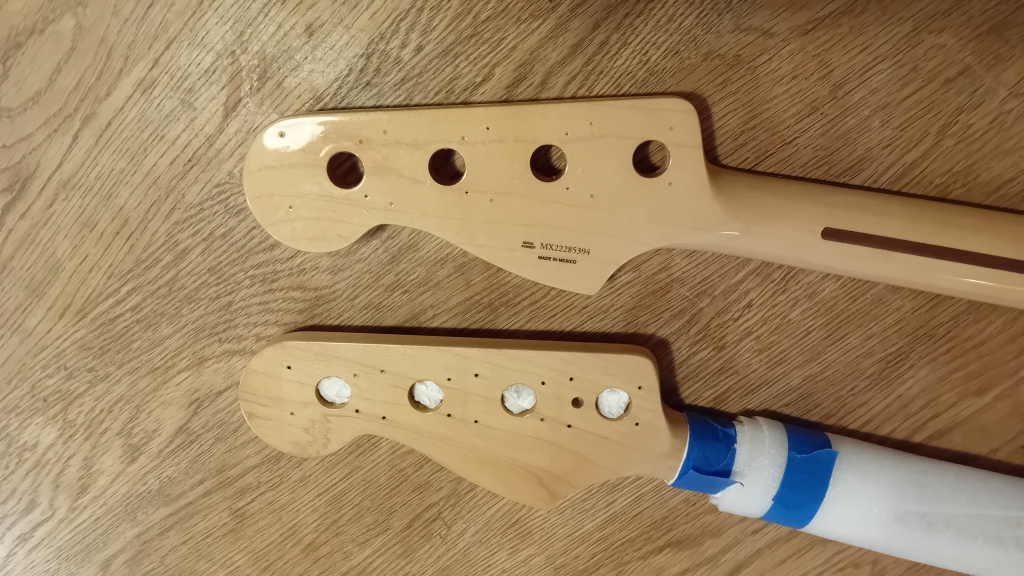
Ultimately – you can’t beat being able to compare the developing tone against some “real world” examples, (and it’s also useful to check under different lighting types too). In repairing and reconditioning this particular neck – I’m not trying to replicate a really old “vintage” neck, with a deep, dark “ambered” finish. Instead – I’m quite happy to restore it to an “as new” condition – for use with a brand new, 2023 Jazz Bass body. Maybe with just a little more “colour” to the face of the headstock, only. So to get the colour right – it was useful to be able to compare the developing tint against the colour of a brand new Fender Precision neck, which I’ve recently sourced for my “natural” PJ build. This 2023, “Seventies style” P neck is also Mexican made, and is finished in a thick, glassy, Fender Urethane coat. It’s close to the sort of finish I’ll be aiming for with the back of this Jazz Bass neck restoration. It’s good then – to see how natural the developing tint looks, in context, against a “close cousin”.

However – for the face of the headstock – I’m aiming for something, just that little more amber – (although nowhere near as yellow as any of my “relic” or “vintage” type spray coats). With a “control” to compare against – I’m able to check regularly as the tone builds up, and stop while the effect still looks natural enough. The fresh coats of nitro do still look fairly “plump” while they’re still wet, and they can also look a little bit misty due to “blooming”, (due to moisture in the atmosphere). Usually – any cloudiness clears as the nitro dries, and the tint tends to “settle”, so that it looks more “in the wood”, as the lacquer cures and tightens. Ultimately – the tint layers will lie under thicker layers of clearcoat, which will be highly polished – so a little extra colour might be acceptable – since it may help to contrast against the gloss highlights.
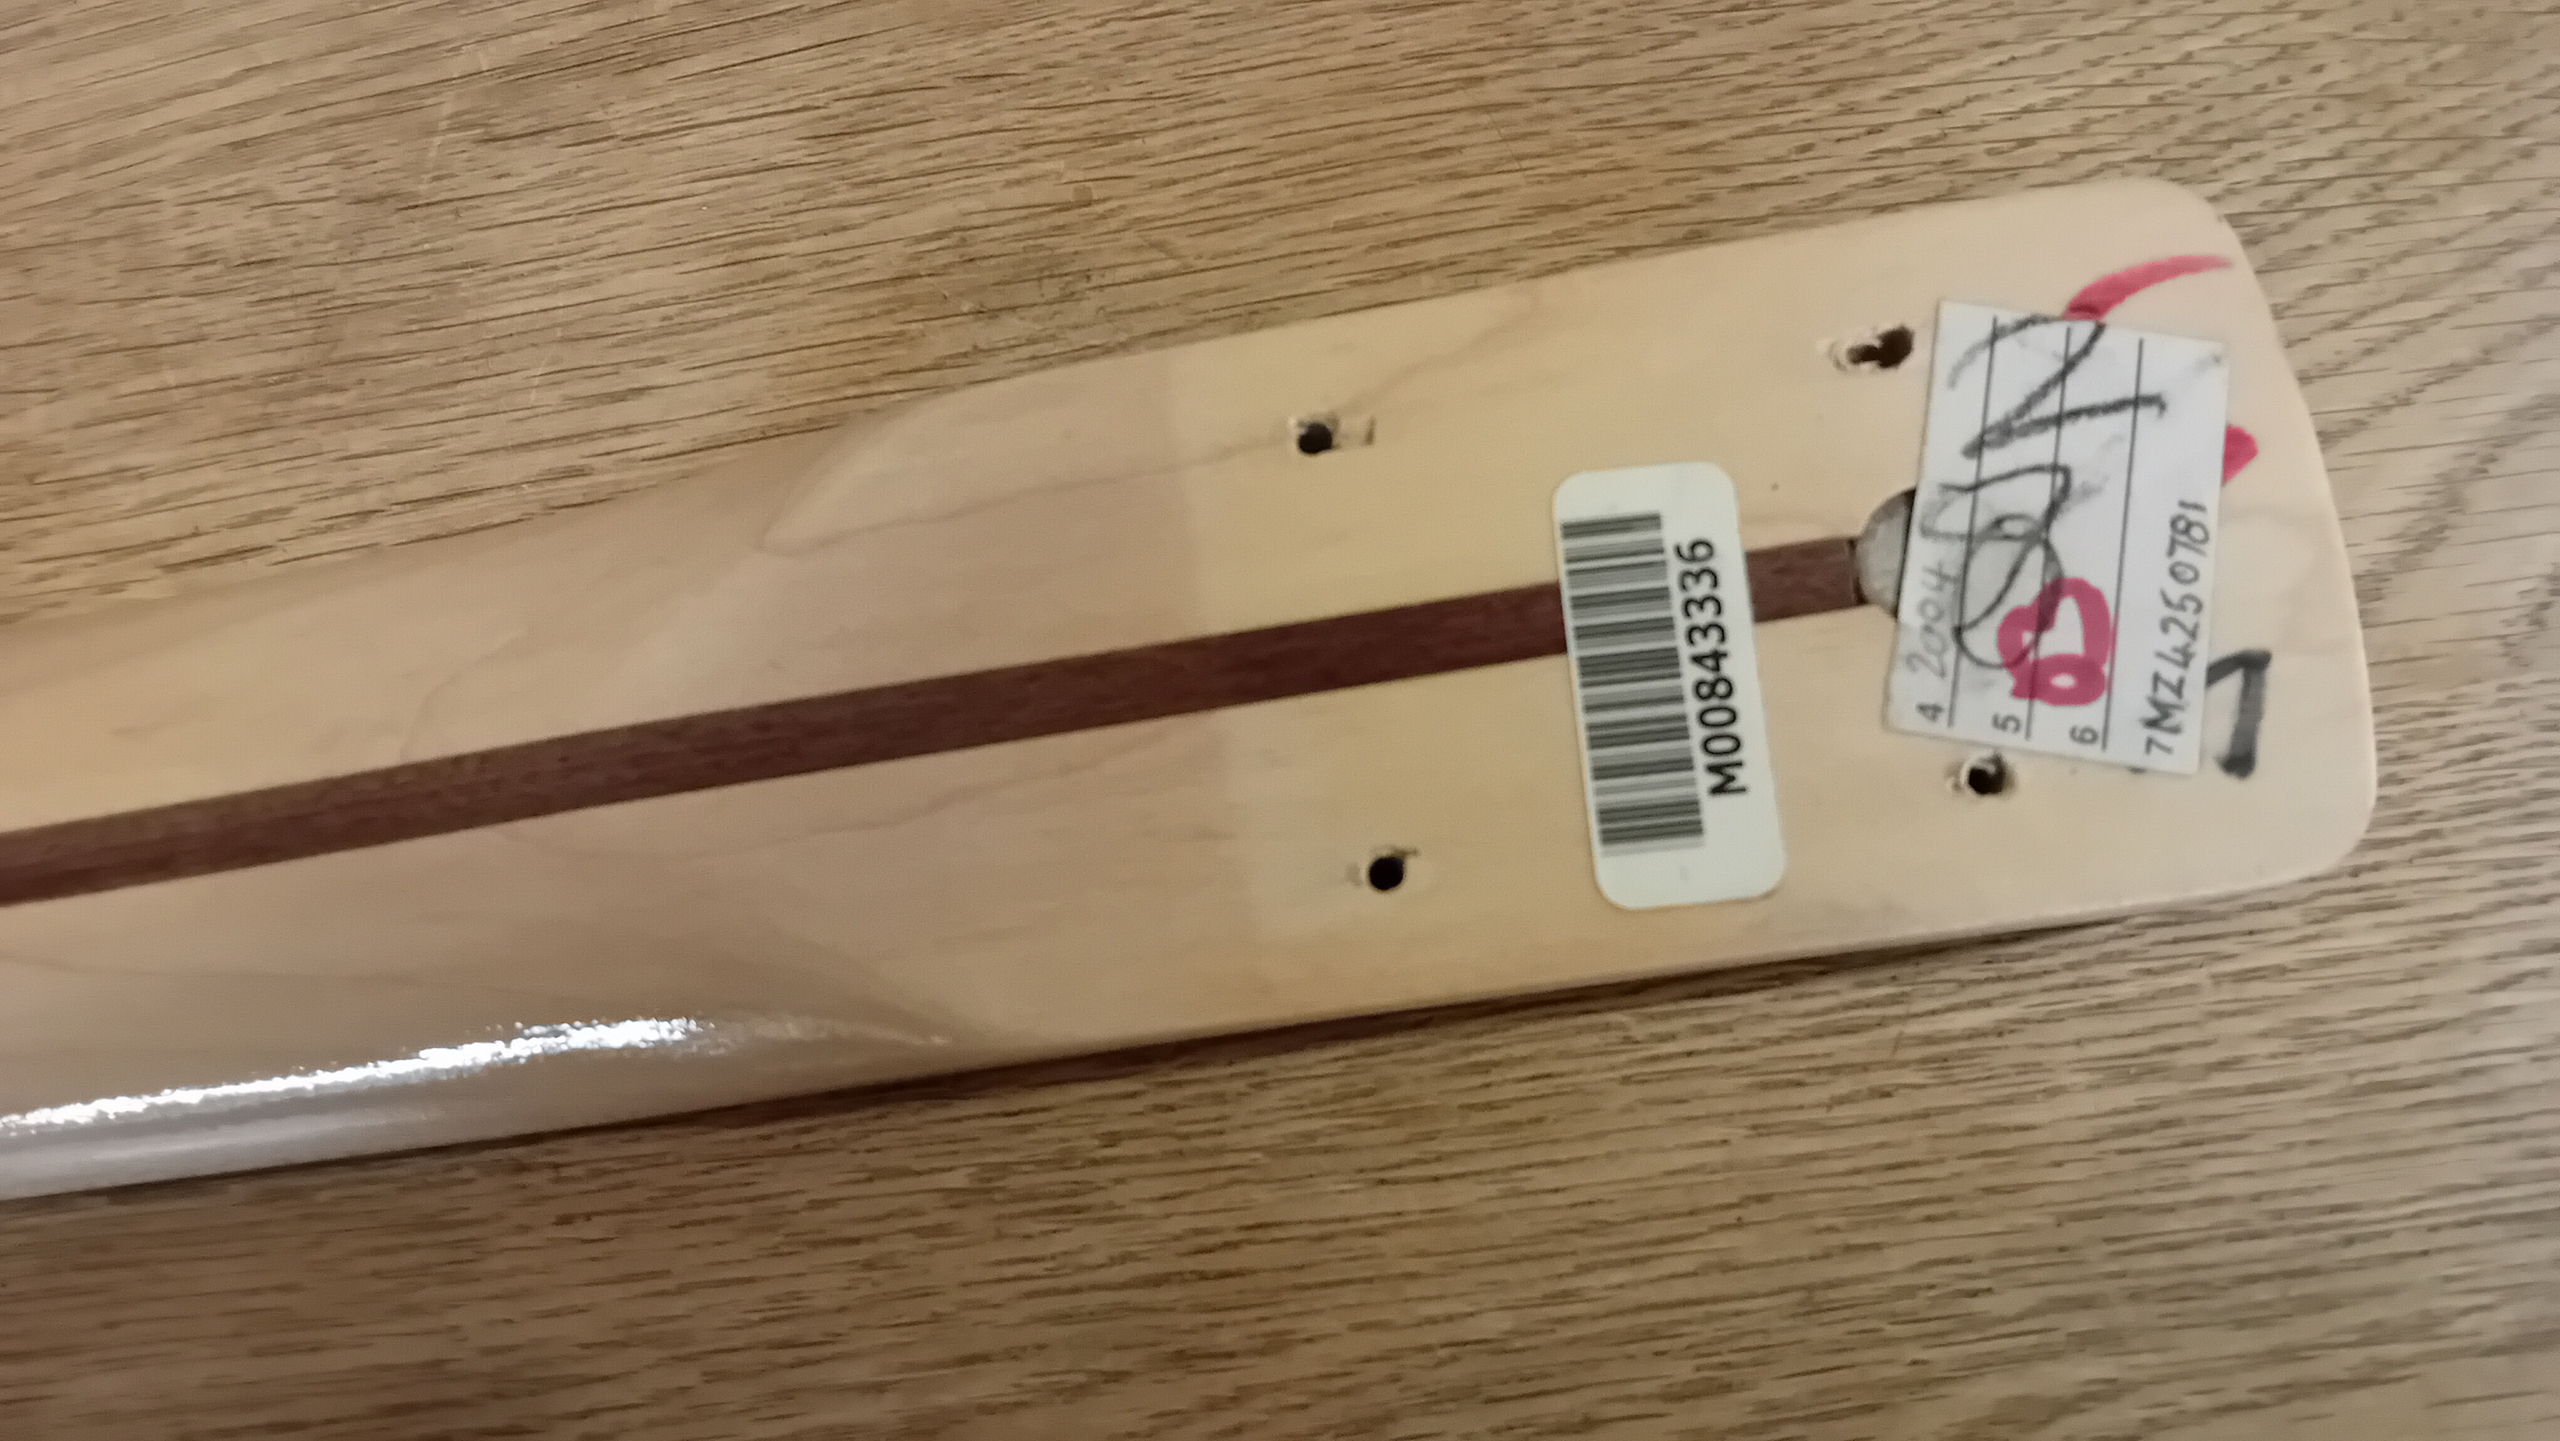
Although the sprayed colour, as it reads, is usually pretty representative of the final effect – I’ve noticed that these tint coats do, sometimes, lighten or darken as they dry. Nitro can yellow over time – but usually – that colour change happens over quite a long period. I’m not sure if this is all to do with the lacquer – or if the wood underneath also changes colour slightly, due to some sort of chemical reaction. Regardless – it’s essential to continue to monitor the developing colour, as the lacquer cures. The image above shows the area down at the heel of the neck – where the normally unexposed section still displays some of the “original” finished colouration from 2004. It’s a useful area to gauge exactly how much the wood has been artificially tinted beyond it’s natural colouration, and also to check that the additional toning appears to look “natural”.
Once the tinting and toning results in the exact colouration I want – the nitro coats are given time to dry out completely, and to properly harden. However – depending on the next steps, (which, in this case, is the application of some waterslide decals) – it might be useful to apply a couple of thin “barrier coats” of clear nitro first – so that the tinted layers will have a bit of protection, when rubbing back subsequent clearcoats. Either way – the lacquer needs to be hard and flat, before the decals can be applied.
