

I don’t have a notched straight edge which properly fits a Telecaster neck – so I can’t check it’s exactly level before I start. It looks good however sighting it along the edge – and if I look along the length of the neck from heel towards the nut, then all the frets look parallel. The neck is from Northwest Guitars – same as with the Ash Stratocaster. I had no problems there, so have every reason to believe the same for the Telecaster.
A check over with the fret rocker shows that most of the frets are level – but there’s a few inconsistencies. I might as well level the frets properly and re-dress them, so I have a good start when it comes to setting the guitar up to play. Although the guitar will be heavily reliced – I want it to play well, so I prepare the neck by masking off the fingerboard with some heavy masking tape. With only the frets now showing, I take a permanent felt tip pen, or Sharpie, and run it along the top of each of the frets leaving, (in this case), a blue ink line. Since I plan to work a little falloff below the 15th fret, I mark that particular fret so it’s clearly identified. Taking my fret levelling beam, I then run the coarse side along the neck – from heel to nut – in one smooth stroke.

It’s important to run straight up the neck – not diagonally, or across the neck. Because the levelling beam is narrow, it’s necessary to complete a few passes to completely cover the neck, and you want to make sure you’re following any radius on the fingerboard and frets – so any treatment should be equal and consistent. Try not to work one side of the neck more than the other. This helps stop buzz on string bends – which I find can be a problem on radiused boards with badly levelled frets. As the grit paper on the levelling beam cuts, it removes the blue pen mark on the top of the frets. Once all the frets along the length of the fingerboard show silver – then they should be level. Any remaining blue marks show low spots, and the frets need to be levelled until these low spots are removed. It’s a process reliant on consistent, straight and even passes along the neck, untill all the blue pen has been removed.
As soon as the tops of all the frets shine silver – the process is repeated with a series of even, consistent passes with the fine grade grit, on the other side of the beam. It’s important not to overdo it here either – the purpose of the finer grit is to help begin the process of polishing up the frets again. I’ll be doing a lot more of that as the day goes on.
I then repeat the process – but focus only the area from fret 15, down towards the heel. This should provide a little fall-off at the high end of the neck, but it’s not really necessary. I haven’t bothered on either of my previous projects. I’m told it can help with setup however, and I thought I’d use this project to see what a difference it makes for me.

All the frets now have flat tops, and will require reshaping so their usual curved crowns are restored. I use a couple of special files for the purpose. One has a slightly curved triangle section, which allows the file to run along the length of each fret in turn, gradually working at the angle, until the proper curve is restored. The other has a curved, fine diamond studded channel, which can be worked along each fret to even out any inconsistencies resulting from the initial filing. To help see where the file is cutting, it helps to run the sharpie along the flat top of each fret again. By working each side of each fret in turn, it’s possible to gradually reduce each line to an absolute sliver. That indicates that the crown has all but been restored. The curved, diamond file finally finishes the job of crowning the frets.
As with all fret finishing, it helps to be consistent and even in your approach and application – you don’t want to overwork any particular fret and create another low point. Once the frets have been crowned – a quick check over with the fret rocker shows if your work is good enough to proceed to polishing. If there’s anything wrong – fix it now.
The fret file can now be used to gently reshape the ends of each fret – removing any sharp edges which will make playing uncomfortable. Bear in mind however, you’re only trying to smooth the frets – not completely reshape them. Once all the levelling and shaping is complete, the frets can be polished. I usually take a few grades of wet and dry paper, and work through the grades – holding the paper between my fingers, and running it up and down the neck. Something like 800 – 1000 grit should do it. Then, using a fret shield – a thin sheet of metal, with a fret shaped slot cut out, to isolate each fret in turn – I work along the length of each fret with wire wool to remove any lateral scratch marks. Working through 0, 00, 000 to 0000 wire wool should remove most of the scratches – but check closely. Any scratches left on the frets after polishing will make the strings feel gritty. Although a little rough “key” on a fret can help sustain notes – the actual roughness there is visually undetectable. Ideally, the frets should be polished up until they shine like new pins.
After wire wool, some people like to polish with a Dremel or some such. I use fret rubbers – again working through the various grades, C, M, F, XF.

Once the frets are polished, I remove the masking tape and dress the fingerboard with lemon oil, or fingerboard dressing. I like Crimson Guitars’ own formulation. I rub a generous amount onto the fingrboard with my finger, and then leave it for 15 minutes or so to fully soak in, and then wipe off any excess with a paper towel. After another few minutes, the fingerboard should be fairly dry, and can be buffed over with a soft cloth. I like to repeat this every time I change strings.
The fingerboard looks like new. But this is supposed to be a 50 year old guitar. As I’ve said – I want this to be playable, so I don’t want to start messing around with the neck too much – but to help stop the fingerboard shining out like new against the background of general grunge, I add a dusting of rottenstone to the fingerboard – worked in with a very soft mop headed brush. It gets into every nook and crevice – every bit of grain in the fingerboard, and around the base ofe every fret. Excess dust can be buffed off with a soft cloth, and there you have it – fake dirt.

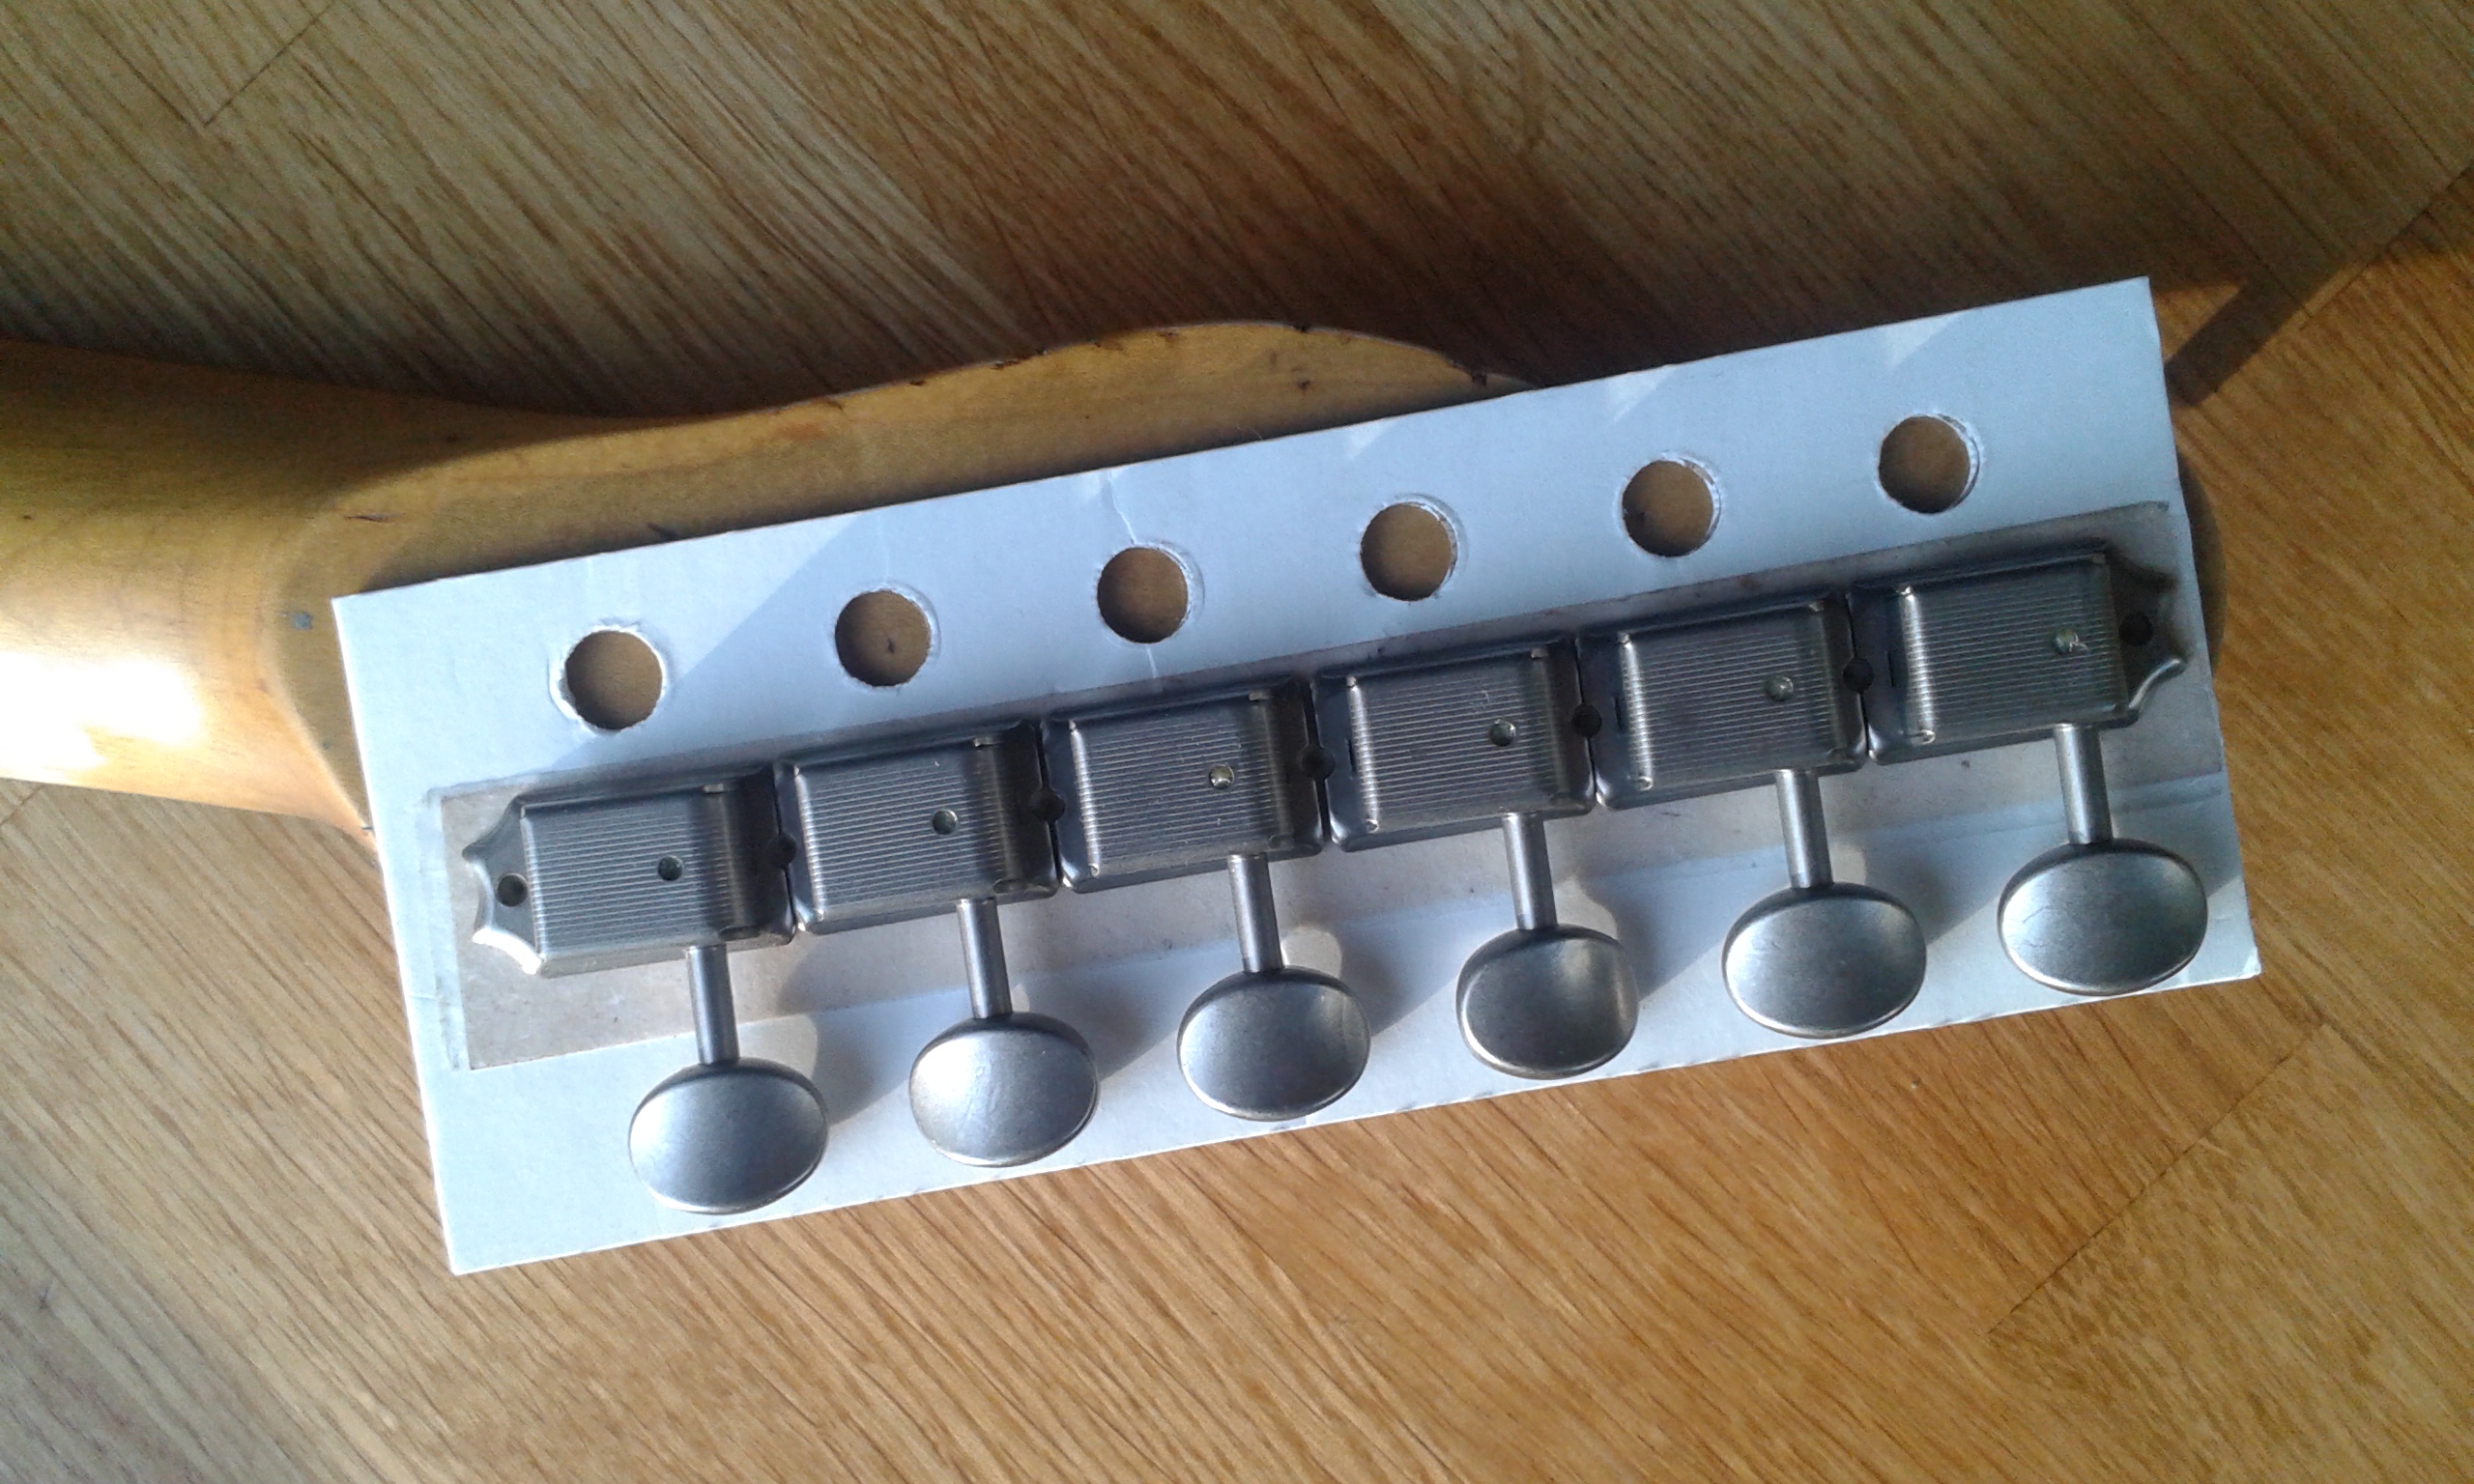
Next job on the neck is to fit the tuners. I’m using a set of Vintage “Double Line” Kluson type tuners by Gotoh – a near identical spec to the tuners originally used on 1960’s Telecasters. They’re not the kind, however, that Strummer actually used – having apparently switched out the originals in favour of some 70’s “F” type pegs. The Gotoh’s will have to do for me, however. Sourcing an exact replica is difficult. In fact it appears there’s little option available in the UK, at all. Besides – these Gotoh’s have the advantage of having already been subtly aged before construction. It means I don’t have to risk messing up a fresh set, with my own experiments in ageing.
The tuners have the usual, vintage diameter posts, and are supplied with 1/4″ bushings to fit 8.8mm drilled holes. – the pegboard on the headstock however has modern, 10mm, pre-drilled holes. I’ve therefore sourced a set of conversion bushings, and have done my own aging to these bushings – taking the shininess off, and adding a little patina. Each peghole is cleaned out with a bit of grit paper wound round a convenient bit of dowel, and the fit checked. The bushings are pressed home with a special tool fitted to my drill press – but it’s important to ensure they are not too tight. It’s always possible that the wood around each peghole might just split with too much pressure. I find it’s best to ream out each hole until the bushing just about fits – but not quite. The drill press then does the job of pushing the bushings straight into the pegholes, allowing the ridges on the outside of the bushings to cut slightly into the surrounding wood. If you overwork any particular hole – (it does happen) – and the bushings end up too loose, a couple of dabs of superglue around the internal edge tends to do the trick.

The tuners can now be fitted through the bushings, and are screwed to the back of the headstock, in line. It’s important to get them straight in line, and that can be fiddly – holding everything in place while you mark out the necessary seven locations for the screw holes to be drilled. I saved a cardboard template from a set of genuine Fender tuners – and this has worked well before. A piece of double sided tape holds the tuners in line on the template board, with holes pre-drilled for the tuner posts. The tuners can then be mounted onto the bushings and held securely in place, while a sharp awl is inserted at the correct locations, to mark the locations of the screw holes.
It’s a phenomenally simple, yet effective tool. All I have to remember to do is renew the double-sided sticky tape occasionally. With the tuners securely held in place, the awl goes in just where it’s needed – crucial to an accurate job. With the tuners backed out of the bushings again, it’s a simple job to drill each hole to the correct depth with the correctly sized drill bit. The tuners can then be mounted and screwed into pla,ce one at a time. I tend to drive each screw in, about 9/10 of the necessary depth – so that the tuners can be adjusted and checked for straightness together. Each tuner has a couple of sharp little lugs on the back, which dig into the wood as the screws are finally tightened, and it helps to save those final turns until all the tuners are on, and are accurately aligned.

The screws are small, yet they need to cut into the wood and hold tight. It always helps to wax each thread before the first fitting. Then, when the screws are tightened – it’s important not to overtighten and strip the thread. No-one likes tuners that rattle.
And that’s the neck, finally ready to go.
